REVIEW – Macro photography can be a creative way to take a photo that shows something we don’t normally see so well. Mobile macro photography is interesting, with many phones having macro support built in, but how good is that macro lens really? To get the best mobile macro photos you should invest in a lens attachment like the SANDMARC Macro 100mm Lens I’m reviewing today.
What is it?
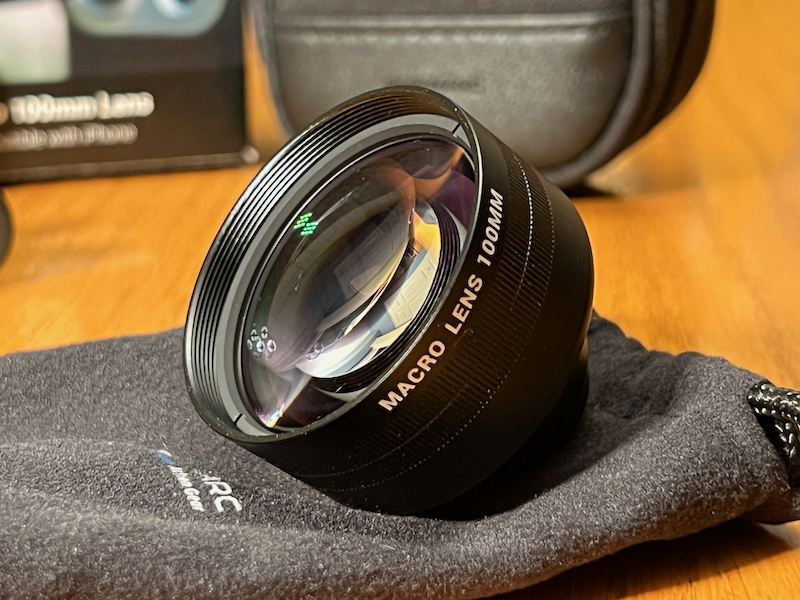
The SANDMARC Macro 100mm Lens is a macro lens designed for iPhone photography. This lens provides crisp focus and natural bokeh compared to the built-in macro of most phone camera systems.
What’s in the box?
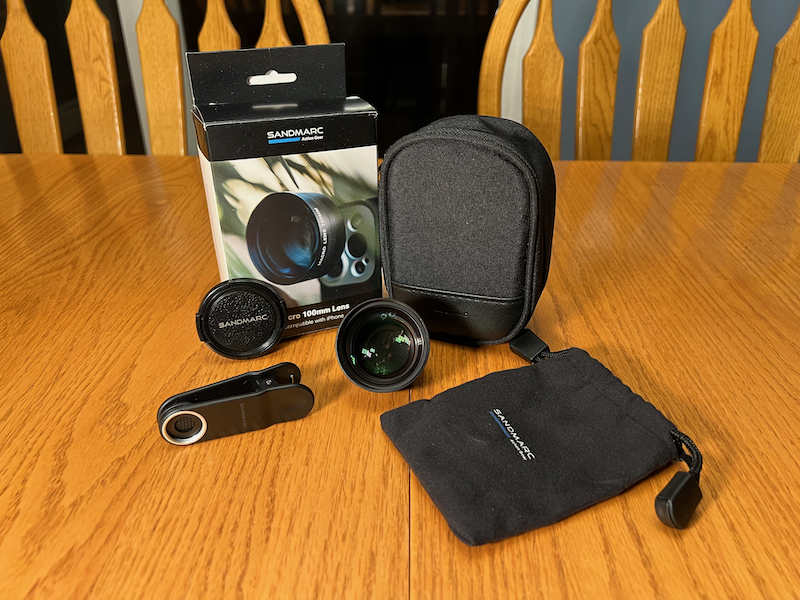
- Macro Lens
- Lens Pouch
- Clip-on Mount
- Cleaning Cloth
- Lens Caps
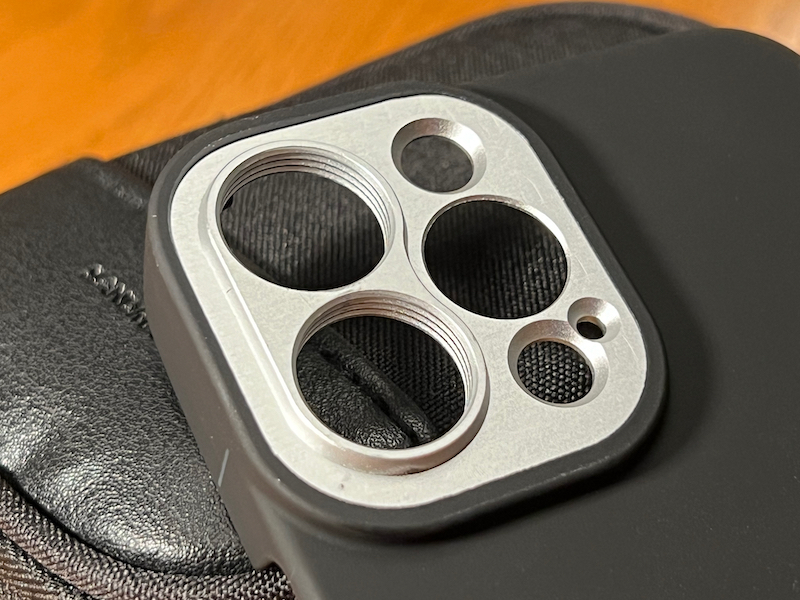
- iPhone Case
Hardware specs
- Lens: 100mm
- Height: 39mm
- Diameter: 48mm
- Minimum Distance: 53mm
Design and features
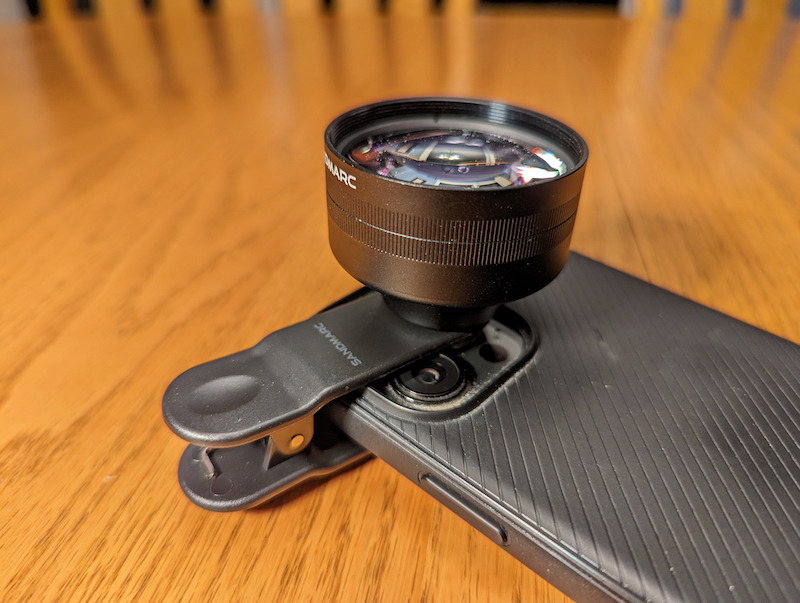
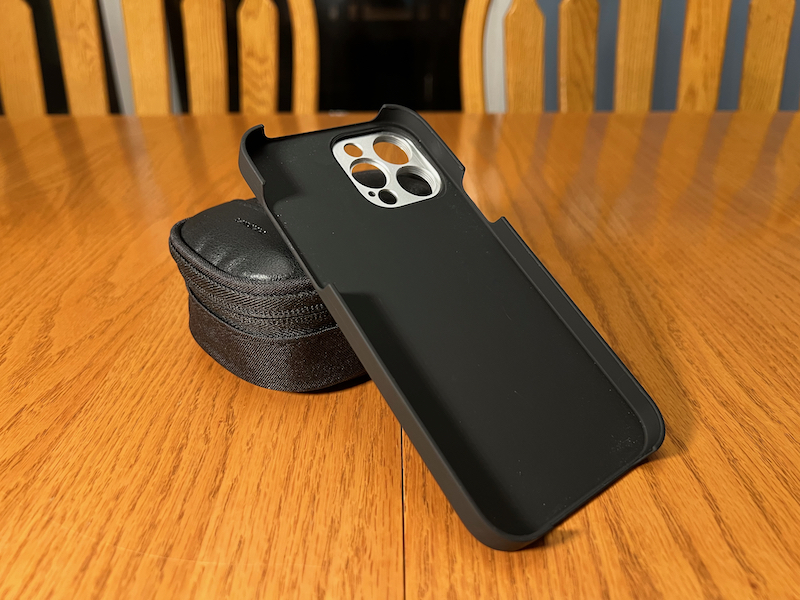
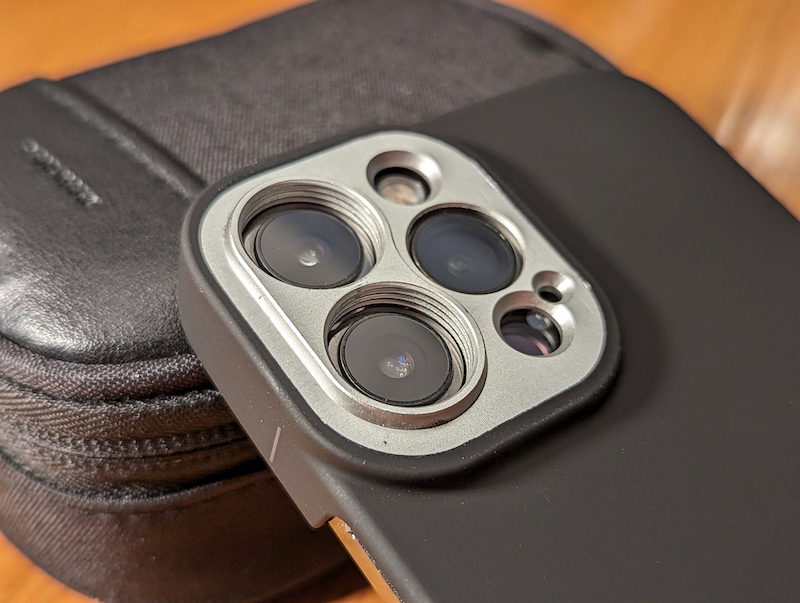
SANDMARC Macro 100mm Lens is a small, black, aluminum lens housing with a large 48mm lens, coming to a small threaded end, which is designed to screw into the included phone case or the included clip-on mount. I have an iPhone 13 Pro Max and the case that comes for that size phone has two threaded attachment points – one for the standard 1x lens, and one for the 3x lens. These threaded points line up the lens correctly to prevent vignetting. When the clip-on mount is used the lens needs to be lined up just right or you’ll see vignetting around the edges of the image. It might even be necessary to use the clip-on attachment without a case, depending on the thickness of the case or how much it sticks out in the back to prevent damage to the phone’s built-in lenses. I found that my case prevented the clip-on attachment from sitting flat against the phone’s lens so it wouldn’t line up properly.
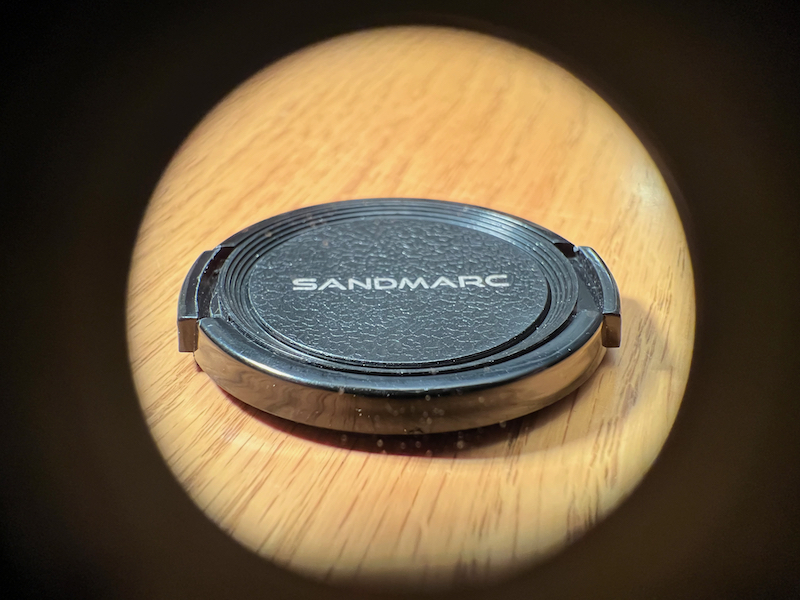
The lens comes with a soft pouch to protect it from scratches or other damage as well as a carrying case for the lens and the clip-on mount. There are also lens caps for both ends of the lens. For the safety of the lens’s glass, make sure not to lose these. A cleaning cloth is also included to help with keeping dust and smudges off the lens.
Installation and setup
You need to decide whether you want to use the included phone case or the clip-on mount. For my use, I mostly used the case because I knew it lined up the macro lens correctly with the phone’s built-in lenses. I used the clip-on enough to test how it works but decided I didn’t want to have to deal with keeping the lens perfectly aligned, especially outdoors when I’m moving around and sometimes barely able to see what’s on my screen because of the sunlight.
I did come across one quirk with the iPhone’s built-in camera app that I couldn’t always work around. It isn’t always easy to select exactly which camera the phone is shooting with. The SANDMARC case doesn’t have a threaded attachment point for the 0.5x lens, so I knew I couldn’t use that one, but when I was trying to use either the 1x or 3x lens, sometimes the screen would show a shot of the back side of the macro lens vs. the image coming through what I thought was the right camera. The iPhone sometimes uses a different camera than you think it’s going to. I was able to correctly select the lens I wanted to use in an old version of Camera+. I didn’t have a recent version of that app to test with, so I can’t say whether it would do the same or not but I can’t imagine it wouldn’t. An app like Halide would probably also do the trick. I don’t consider this a negative mark against SANDMARC. They haven’t done anything wrong, the iPhone is just quirky sometimes when you’re trying to do some specific things like this.
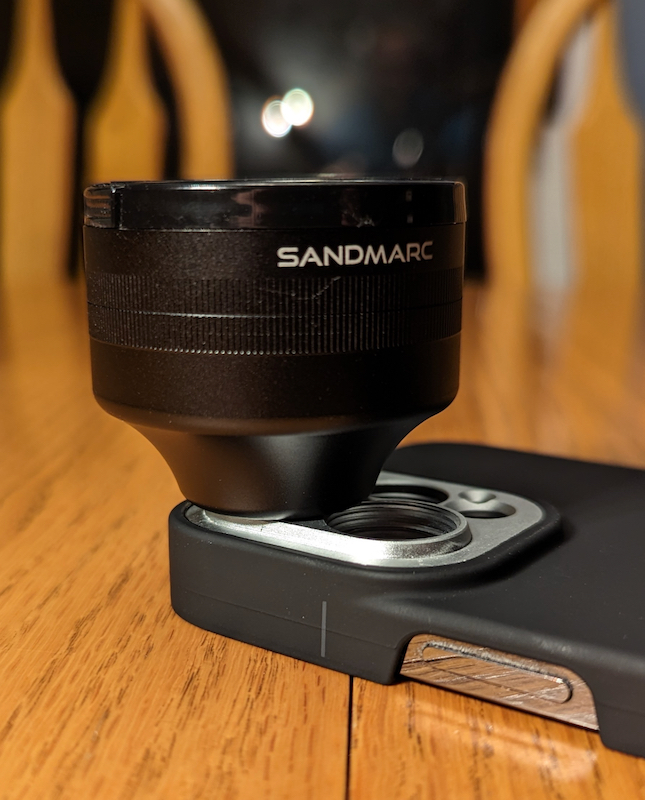
The lens is a bit hefty so your phone is going to be pretty top heavy while using it but I didn’t find this to be a problem to adjust to in my testing. Clearly, you won’t be using the phone for standard phone purposes with the lens attached so this only applies while you’re shooting with the lens attached.
In use
I haven’t actually done a lot of macro photography before. I think I need to spend a lot more time figuring out the process. Most of my test shots were done in my backyard with some trees and flowers we have back there. One thing I found is that the depth of field with this lens is very shallow. The minimum distance, according to a video tutorial on SANDMARC’s site, is 53mm or about 2”. I don’t know the full depth of field but it felt like just a few inches. This means focusing is very critical, which for me while wearing glasses and trying to see my phone’s screen outside in daylight, proved to be quite a challenge. Still, I think I was able to get some pretty decent shots, considering my lack of experience with macro photography. It’s a skill I definitely want to continue to improve.


As mentioned above, I didn’t use the clip-on mount very much. I like the idea of the clip-on mount, but I wish it had some way of making sure the macro lens was aligned properly with the phone’s built-in lenses, like some kind of circular grooves or an indentation that fits around the phone’s lens. I suppose the way it is now means it can be compatible with more phone models, but it didn’t prove to be very useful in my experience.
As far as I can tell SANDMARC does not make a case for Android phones. The included clip-on mount could be used with those but proper alignment would be an issue there as well.
I don’t plan to use the case for my phone long-term. I’ll only use it when I need to attach the lens. The texture of the case is a soft, rubbery texture, which feels good in the hand and helps prevent the phone from sliding out of my often very dry hands, but this also prevents it from sliding into and out of my pockets very easily sometimes. It also doesn’t sit level on the table when I put down my phone so it wobbles a little bit when I go to use it. I don’t consider the texture a negative, it’s just not my preferred phone case material, but I do wish the phone sat flat on the table. Other phone case manufacturers figured that out quite a while ago.
What I like
- Creative macro photography with an iPhone
- Shallow depth of field for a nice bokeh effect
What I’d change
- Proper alignment with the clip-on mount and the phone’s lenses
- Phone case doesn’t sit flat on a table
Final thoughts
If you want to go beyond the capabilities (and true shallow depth of field) of your phone’s built-in lenses, the SANDMARC Macro 100mm Lens is a solid choice. Just make sure you use the case for proper lens alignment with your phone’s cameras.
Price: $129.99
Where to buy: sandmarc.com
Source: The sample for this review was provided by SANDMARC. For more information visit their site.
