
REVIEW – Julie was offered some color calibration gadgets from Datacolor and I reluctantly agreed to review them after much arm twisting and other gadgeteer pressure tactics … OK, I readily agreed to review them. Datacolor sent over samples of the Spyder X Create Kit (which includes the Spyder X Pro , Spyder Shelf, Spyder Tripod, ColorReader EZ, and Spyder USB A to USB C adapter (in case your computer hardware only has the more recent USB C sized ports). At my request, they also included a couple extra items not included in the kit – the SpyderLENSCAL and SpyderCUBE.
What is it?
The Spyder X Create Kit is a primarily a set of hardware and accessories to color calibrate your computer screens so that what you see on the screen matches prints and other output as well as the screen of any other machine that has been calibrated. It also includes the ColorReader EZ that allows you to take readings of colors (e.g., the color of paint on your kitchen wall). The SpyderLENSCAL is a tool to verify and fine tune the focus of any camera/lens combination (fine tuning via settings if supported by your camera gear — more on that later). And finally, the SpyderCUBE is a white balance and exposure tool similar to the Datacolor Spyder Checkr Photo that I wrote about in one of Julie’s recent gift guides for photographers.
What’s in the box?
- Spyder X Create Kit
- Spyder X Pro
- Spyder Shelf
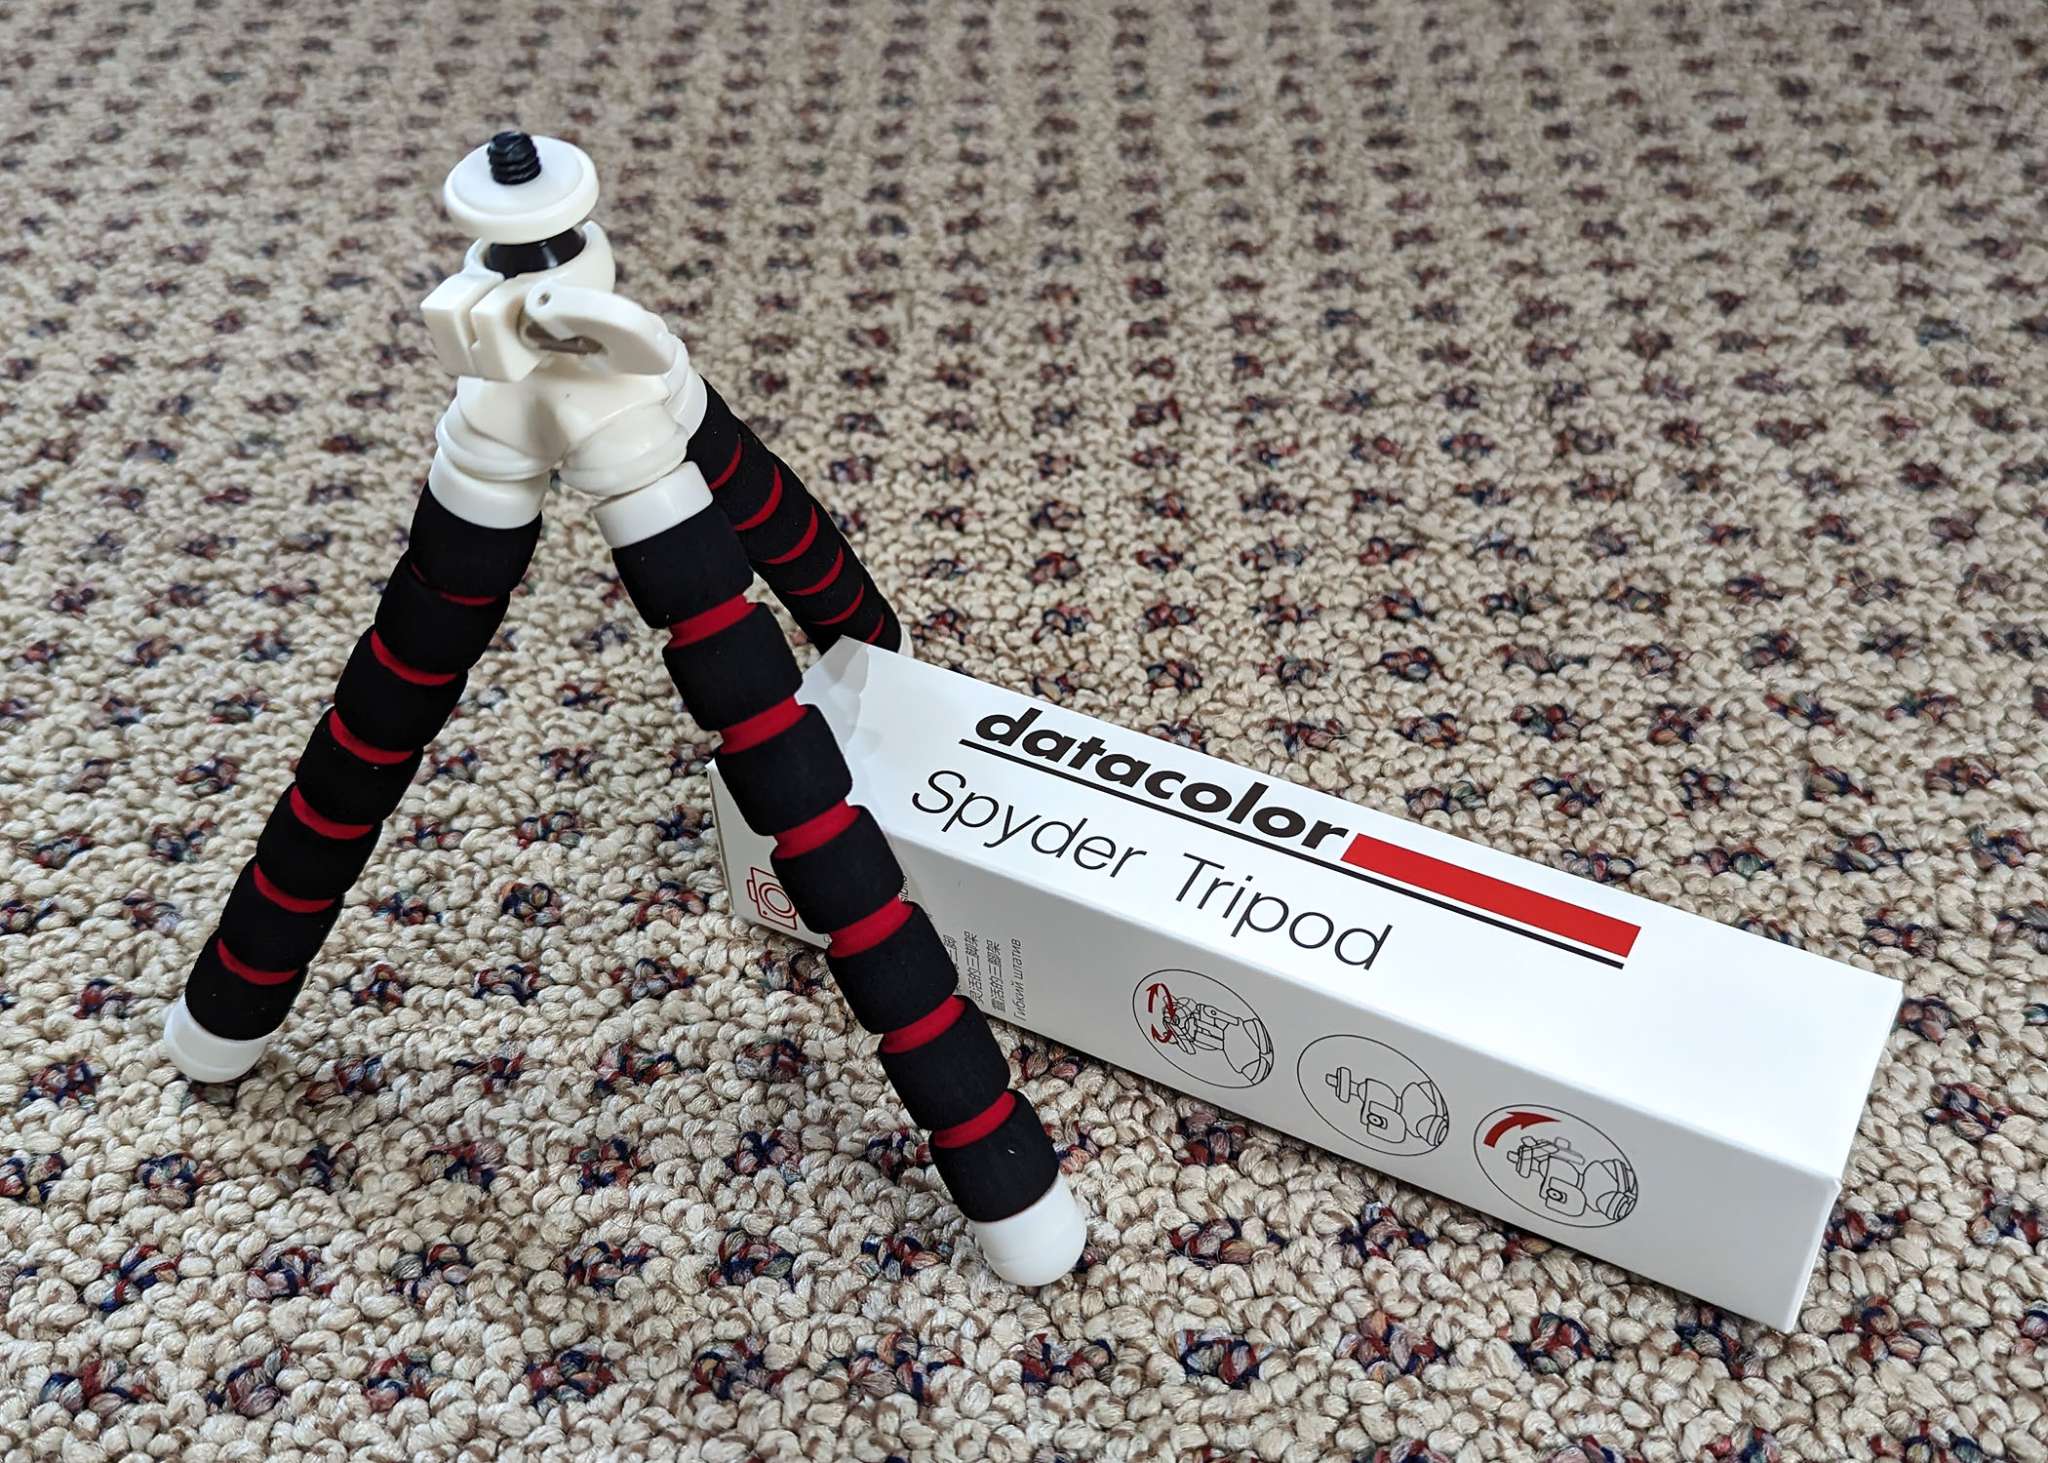
- Spyder Tripod
- ColorReader EZ
- Spyder USB A to USB C Adapter
- SpyderLENSCAL
- SpyderCUBE
Hardware specs
Minimum Computing Requirements for Spyder X Pro
• Windows 7 32/64 and above
• Mac OS X 10.10 and above
• Monitor Resolution 1280×768 or greater
• 16-bit video card (24-bit recommended)
• 1GB of available RAM
• 500MB of available hard disk
• Internet connection for software download
ColorReader EZ
• Android phone with Android 6.0 or higher; or iPhone or iPod Touch running iOS version 9.3 or higher.
Note – before you order the SpyderLENSCAL, make sure your camera supports auto-focus adjustments (typically professional level DSLR’s).
Design and features
Spyder X Create Kit
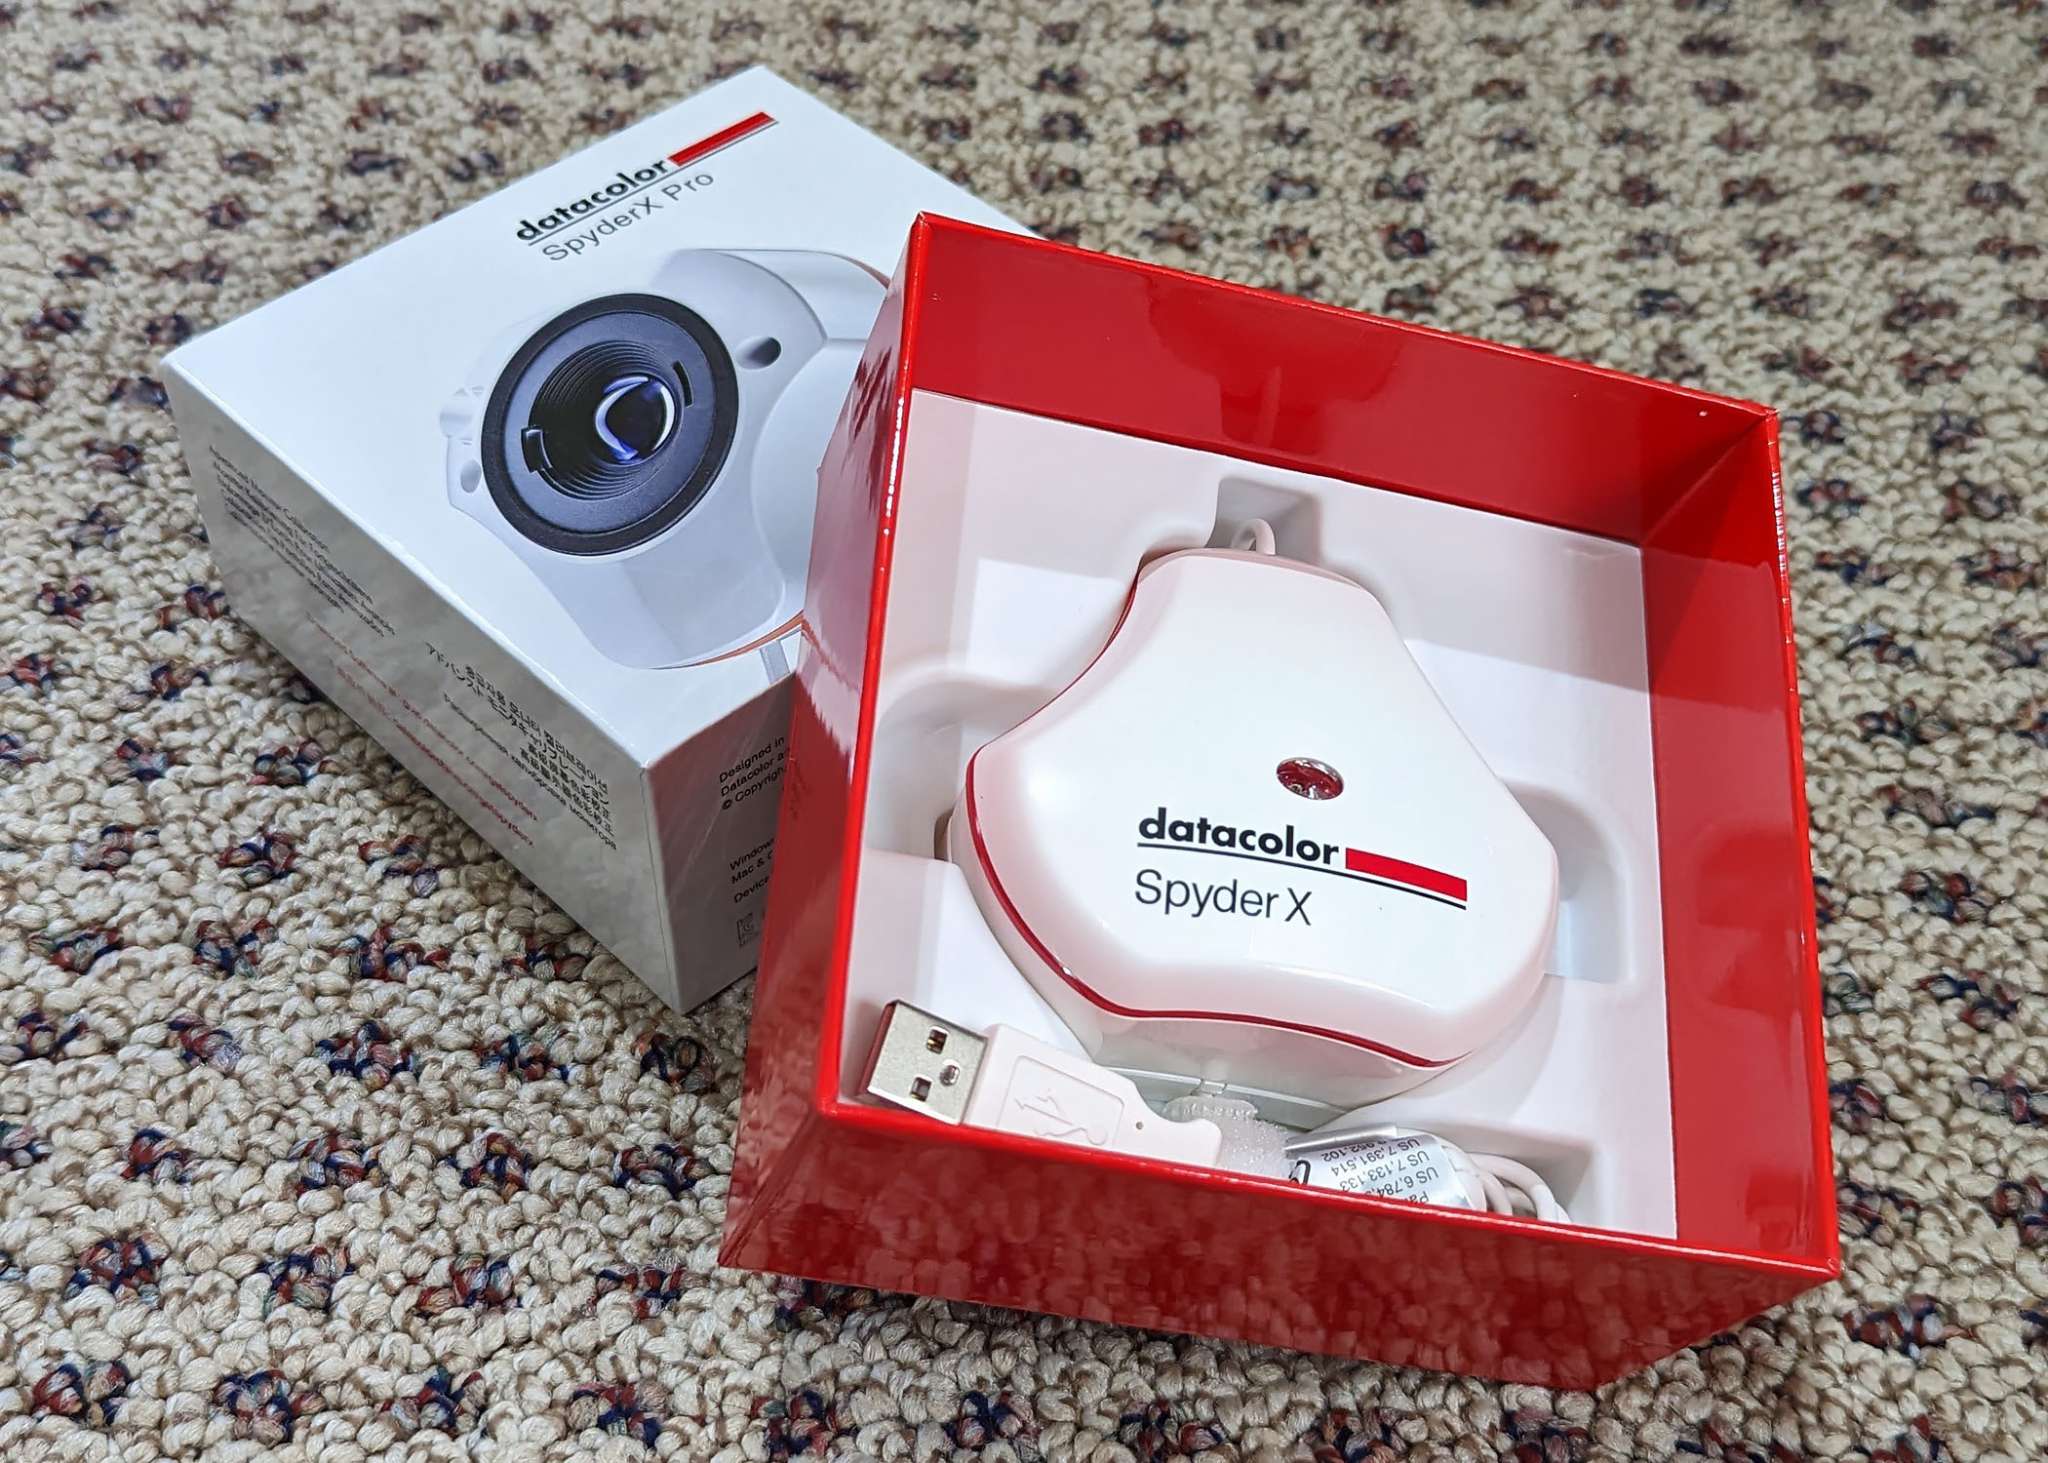
The Create Kit includes the Spyder X Pro sensor and the previously listed accessories that are used to color calibrate computer monitors.

The basic purpose of the Spyder X Create Kit is to set up a monitor so that the image seen on one screen matches the image seen on another calibrated screen — or a printed version of the image. While this sounds simple, anyone who has been dealing with imaging on a computer for a while understands the task is anything but simple. There are many different technologies involved; from the camera sensor or scanner used to create the digital image; to the myriad computer display technologies; to the different ways to produce printed output — traditional photo paper, inkjets, laser toner, etc. Trying to make the colors match up across these different technologies requires a toolset. Datacolor has been providing color matching equipment since 1970. I have personally used their equipment since I began producing digital images professionally in 2005. The Spyder X marks the third different generation of Spyder colorimeter I have used — starting with the original Spyder and followed by the Spyder 3. I no longer have the first sensor, but here is a photo of the Spyder 3 alongside the latest Spyder X hardware.
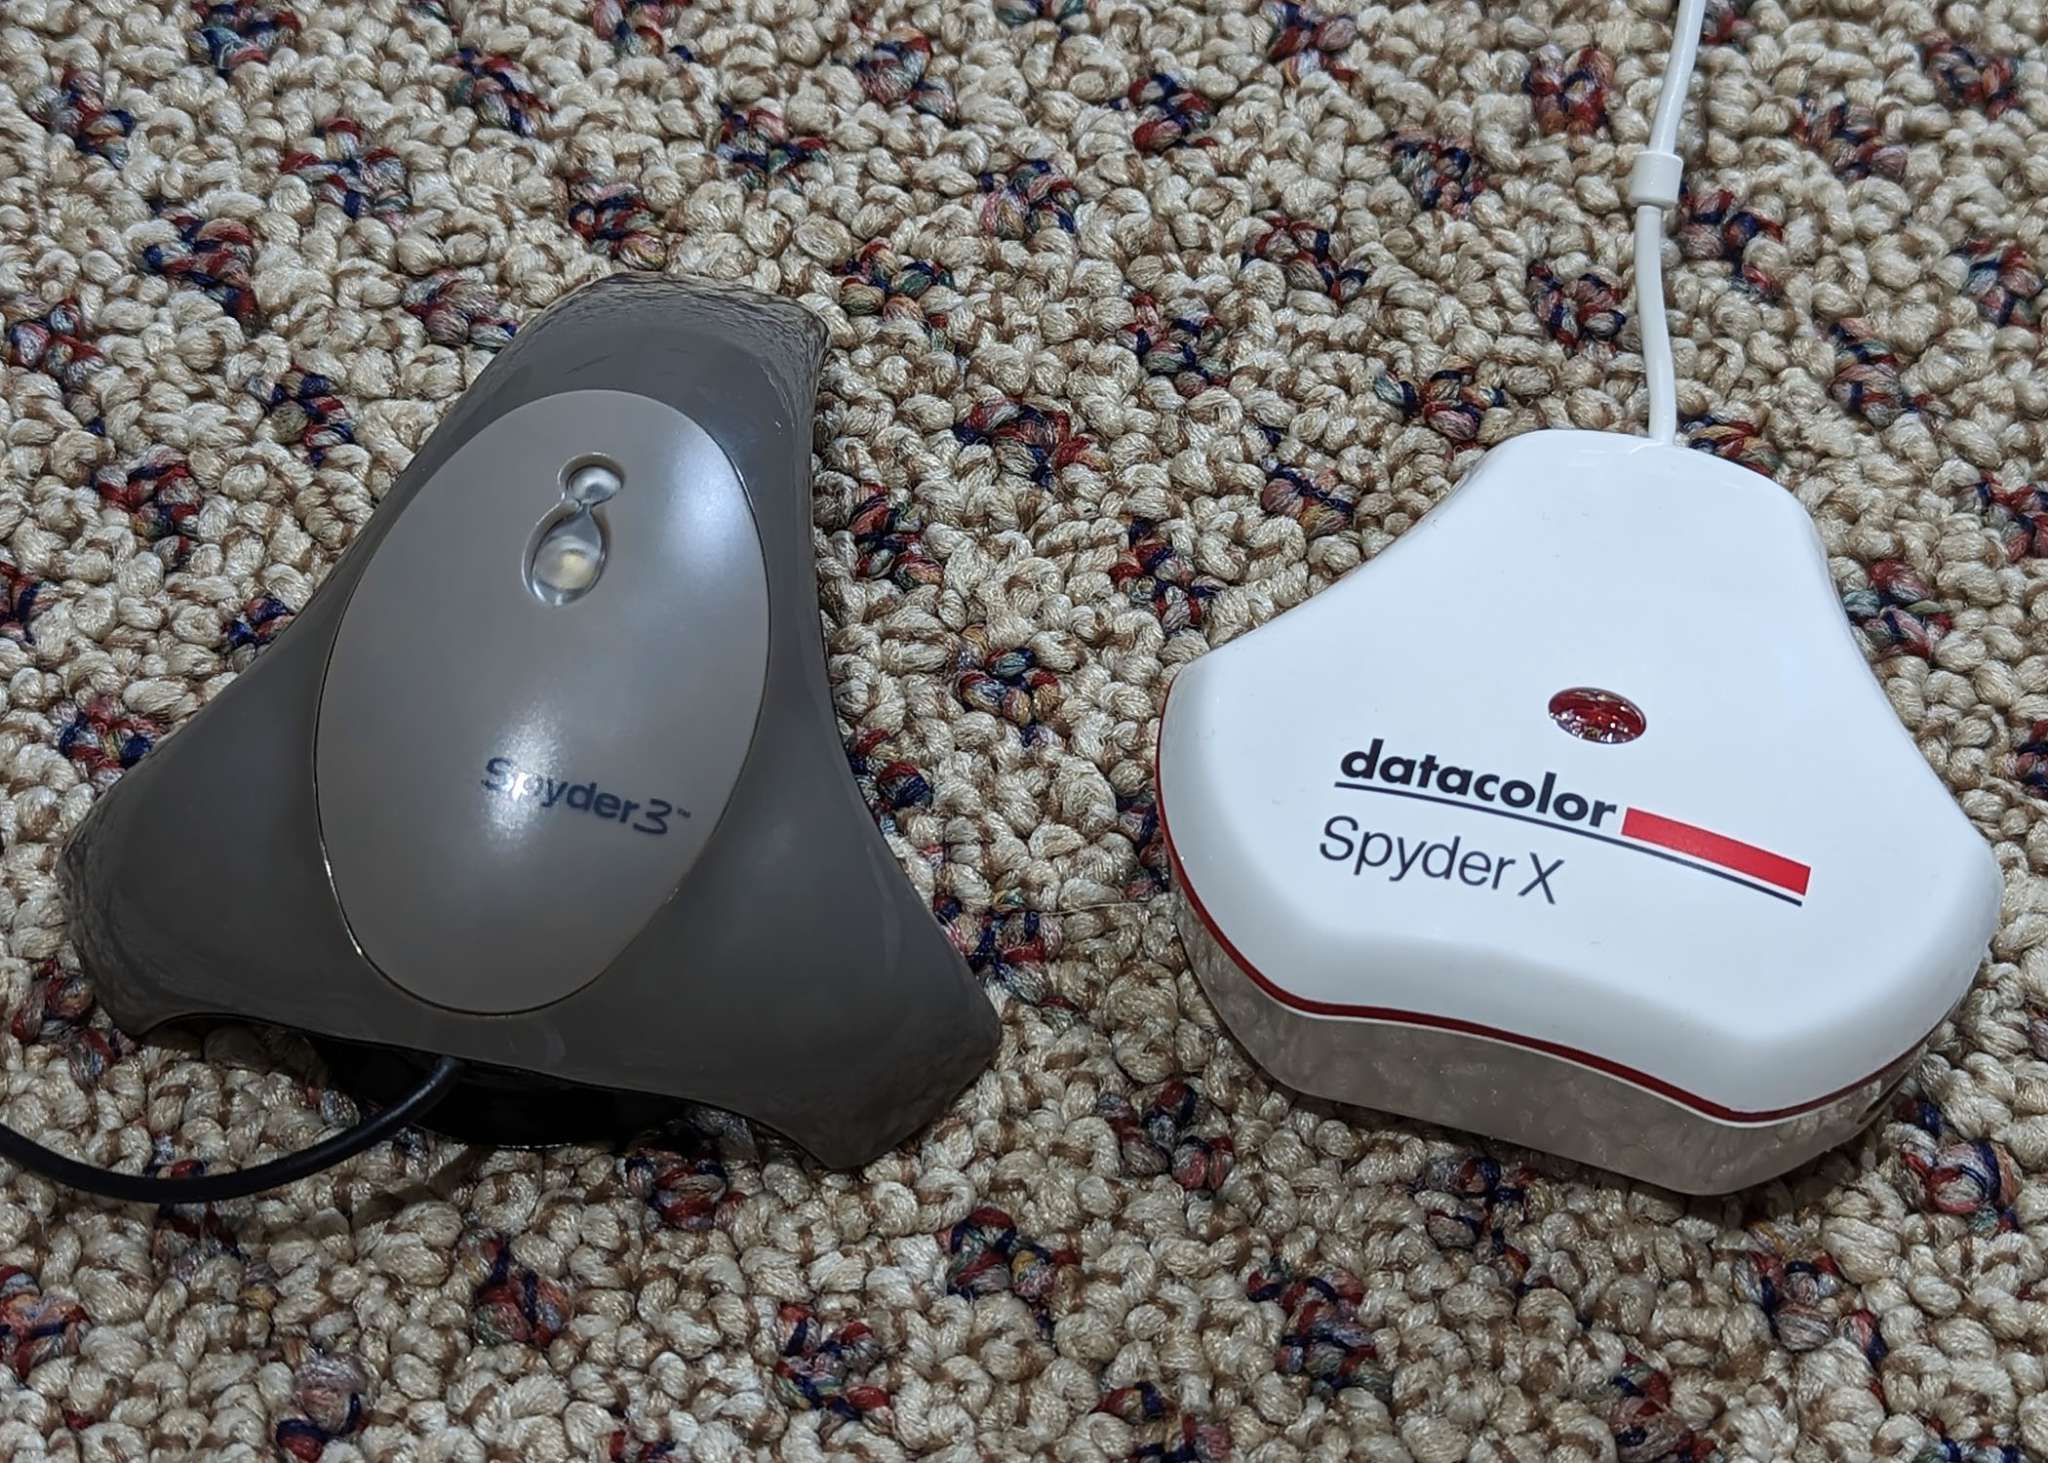
Spyder X features an integrated ambient light sensor (the red oval shape in the center of the white colorimeter on the right). It is worth noting that the older Spyder 3 I have from several years ago also had an integrated ambient light sensor. The sensor allows you to calibrate a monitor for different room light levels, but it also allows the SpyderXpro application to warn you if ambient light levels are too bright to successfully calibrate the monitor. This sensor faces outward when the colorimeter is in place with the primary sensor facing in toward the screen of the monitor being calibrated. Speaking of primary sensors, the Spyder X Pro colorimeter uses a new lens based system, According to their website, this colorimeter has been in development for the past three years.
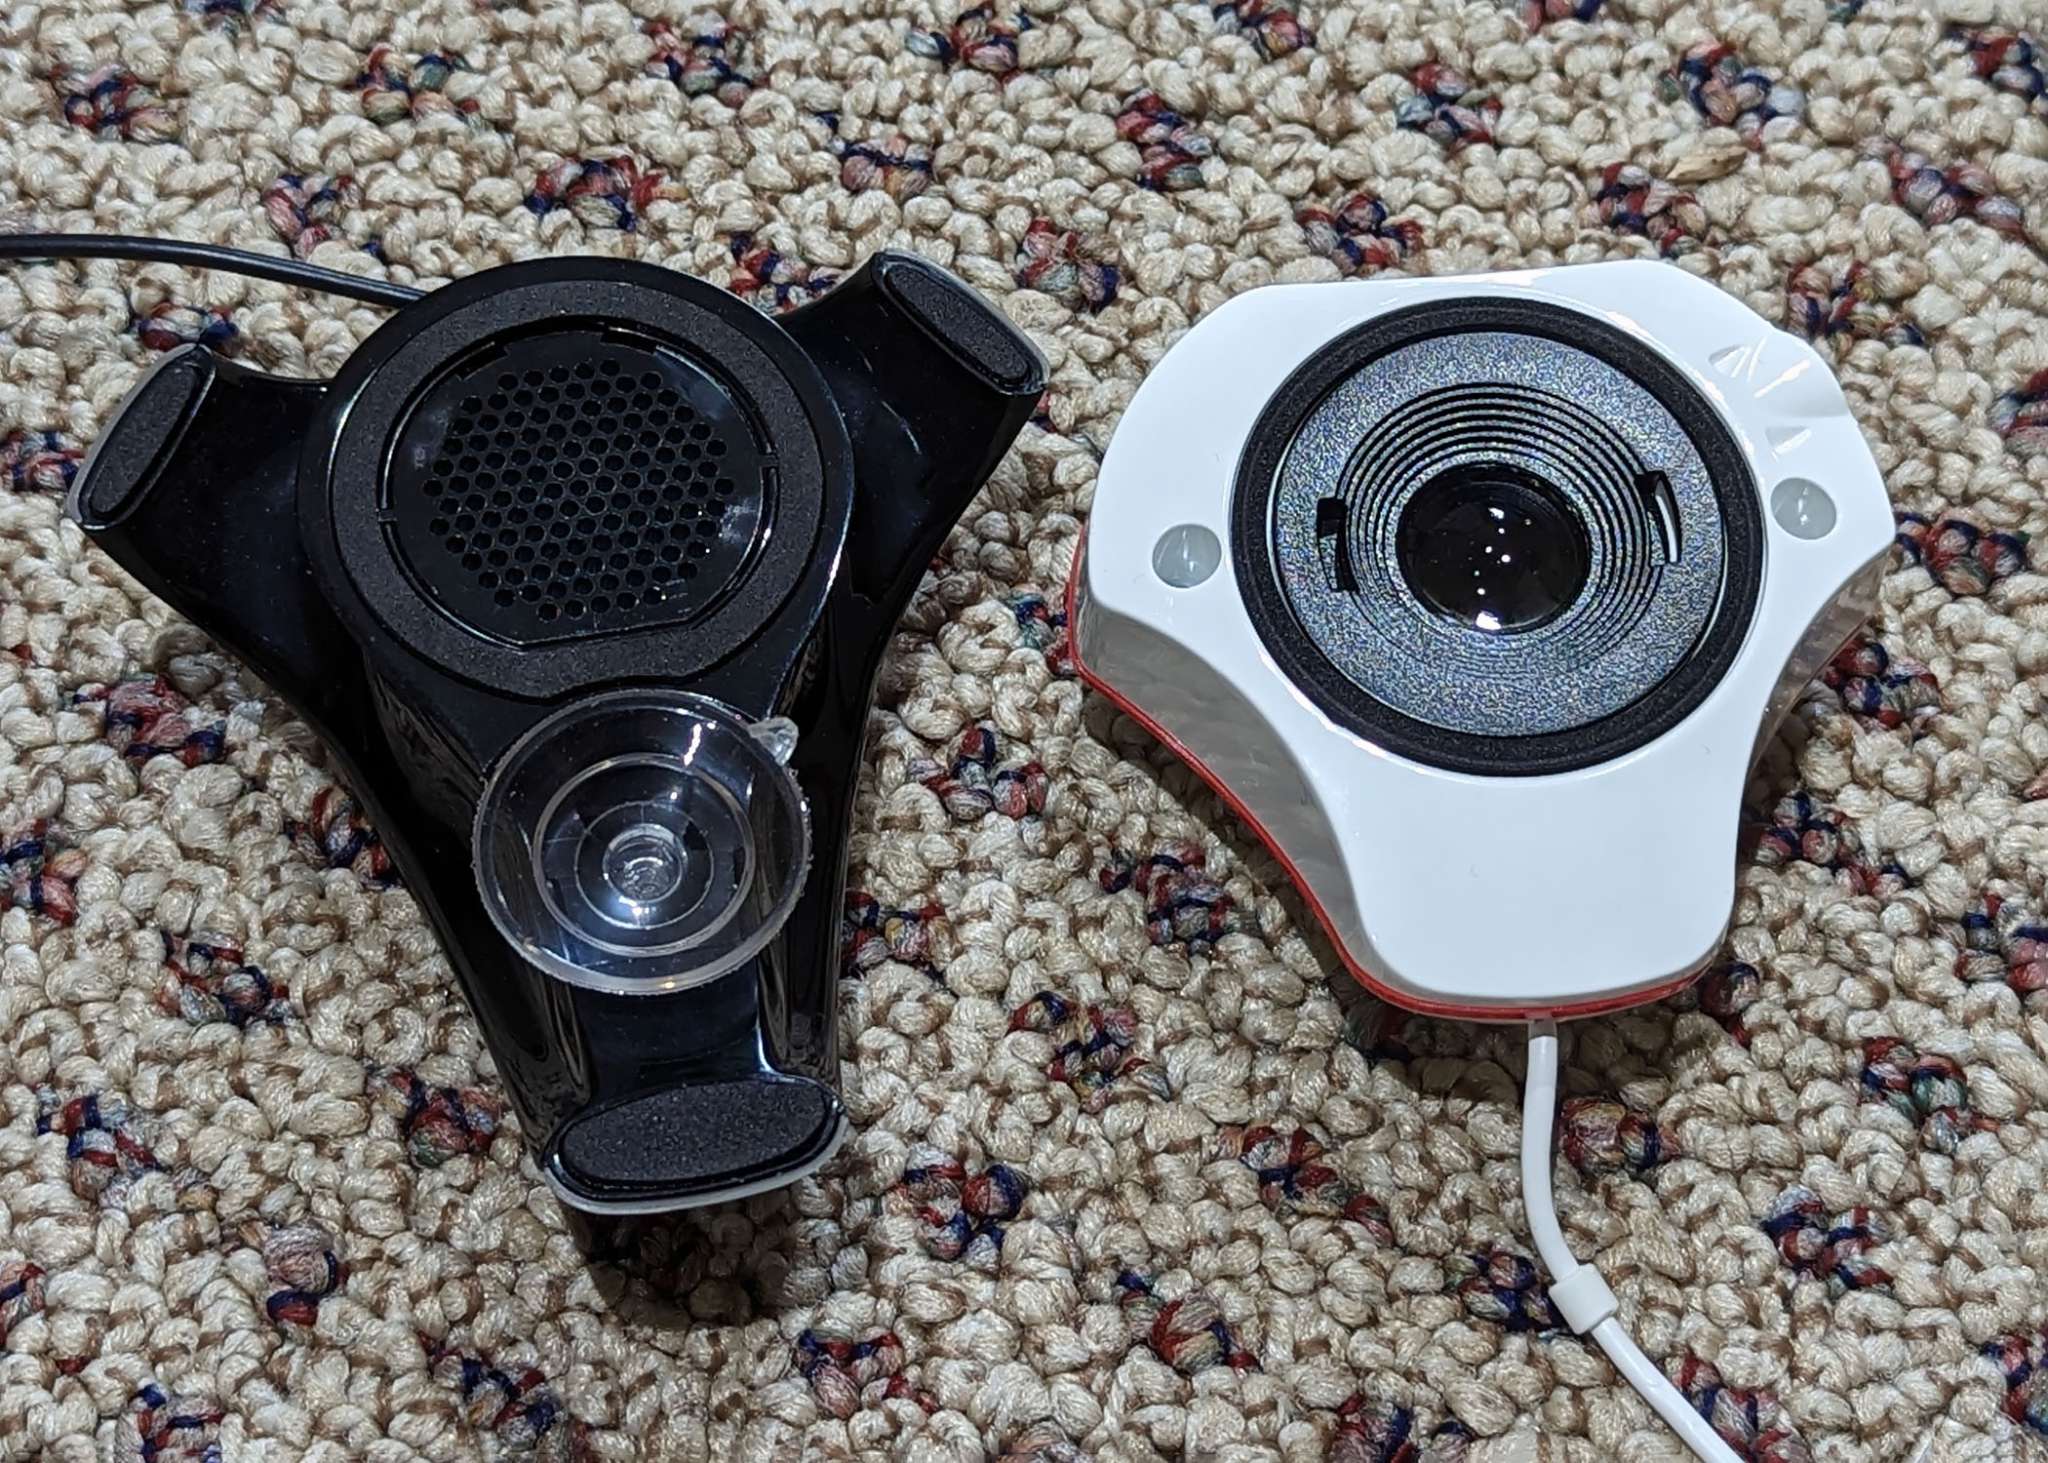
As you can see in the photo above, the older Spyder 3 colorimeter used a sensor with a series of small holes metering the light down into the sensor. The Spyder X uses this newly developed lens-based system which, according to Datacolor, features higher light sensitivity and more advanced sensors. You should experience significantly more precise screen color, white balance, and shadow detail.
To use the Spyder X Pro you will need to download and install the software from Datacolor (information about this process can be found under the Setup heading below). When you launch the application, the welcome page will explain that the screen to be calibrated should be warmed up for at least 30 minutes. It also asks if you have checked that no intense light is falling directly on your screen. At one point when I was just running back through the process to capture steps, etc., I had left the shades open on a south-facing window that had pretty direct sunlight streaming onto my monitor. The software — apparently reading this light through the sensor on the back of the device — informed me that conditions were not right for monitor calibration. I had to close the shade and start over.
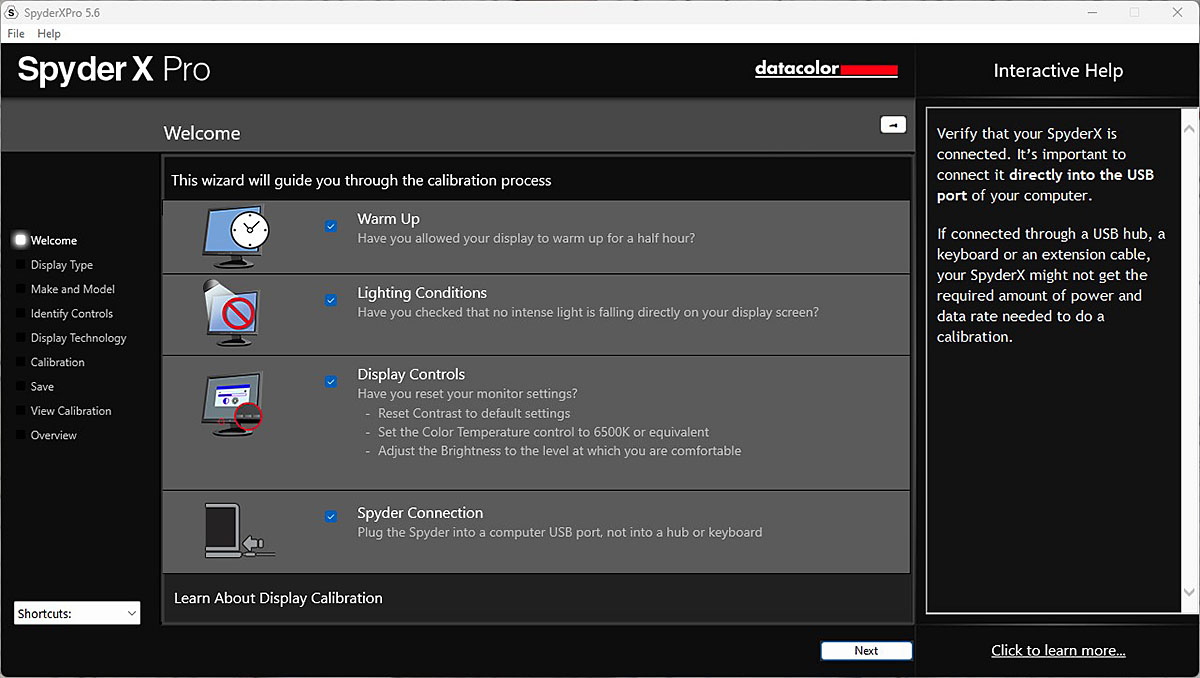
It also reminds you to reset the monitor to default contrast settings, Color temperature to 6500K (if possible, of course) and adjust the brightness to a comfortable level. Note, later in the process it will have you dial brightness into the appropriate level for calibration and this brightness level will have to be maintained going forward for effective color calibration. The last reminder is to plug in the Spyder into a USB port. At this point, you also need to be sure the app is running on the screen to be calibrated. The app will run you through a few questions about the monitor being calibrated (LED, OLED, etc).
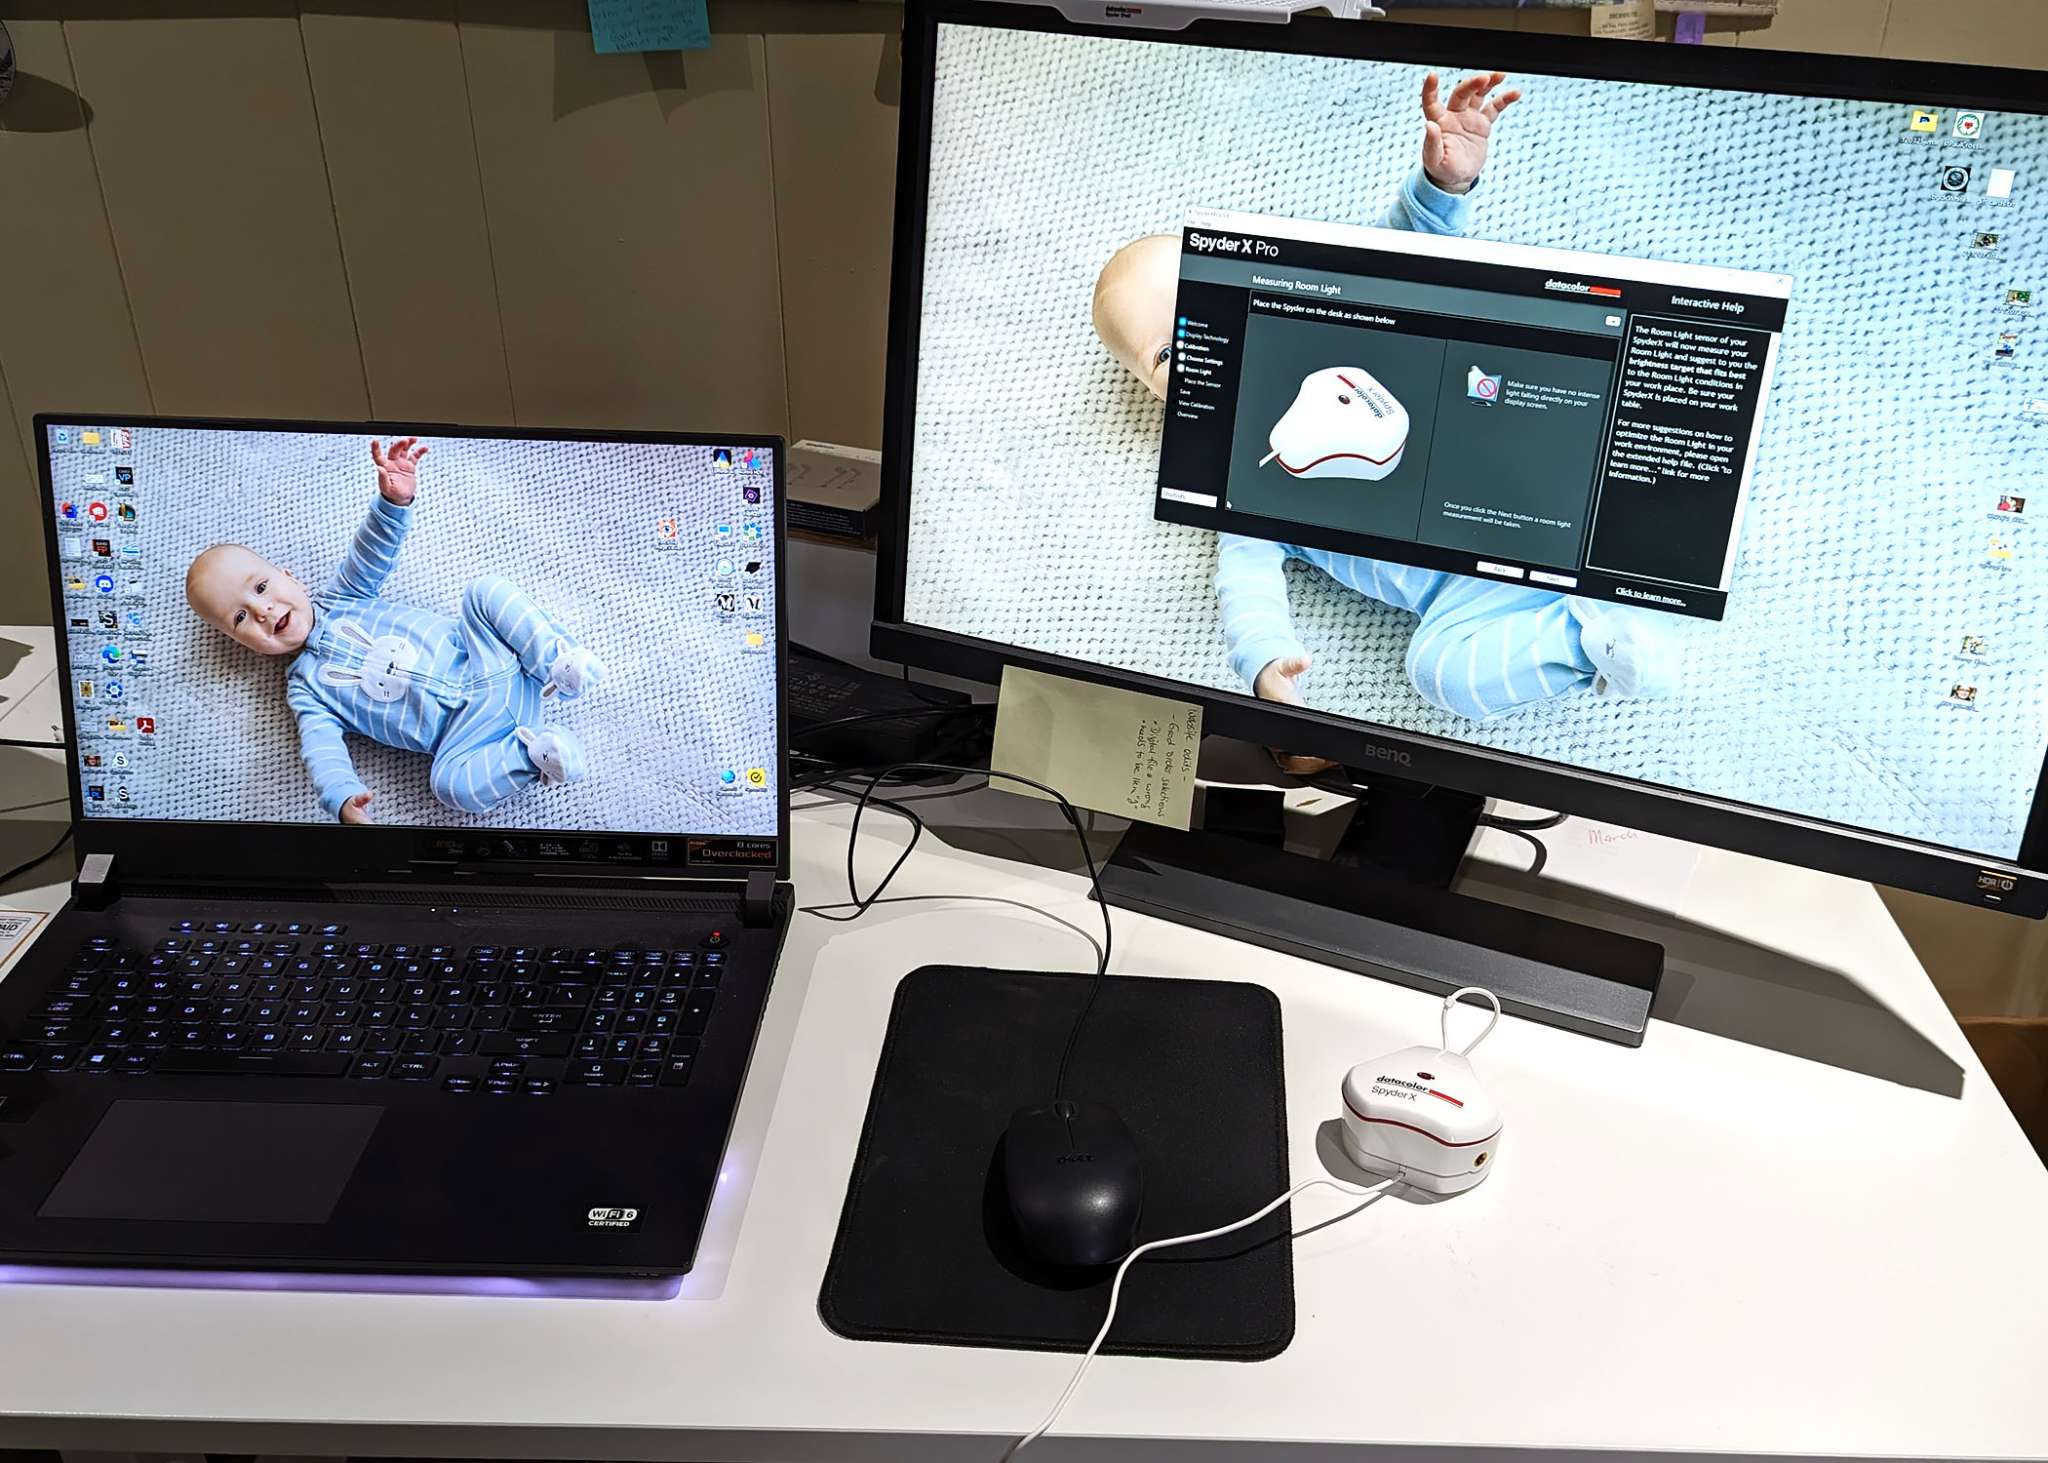
The Spyder X Pro app instructs you to lay the Spyder X colorimeter on the desk with the lens down and the ambient light sensor on top as shown in the photo above. After you place the sensor as specified and click the next button the Spyder X takes a reading of the ambient light. The next screen displays a target for placing the Spyder X Pro colorimeter as shown below.
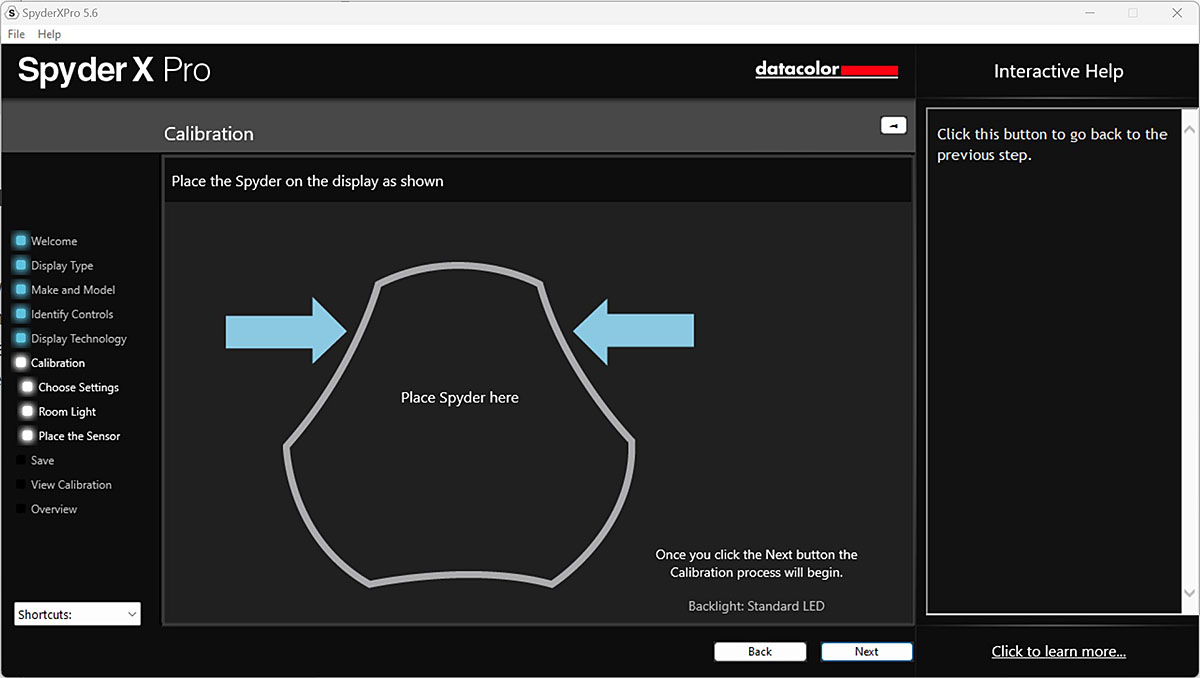
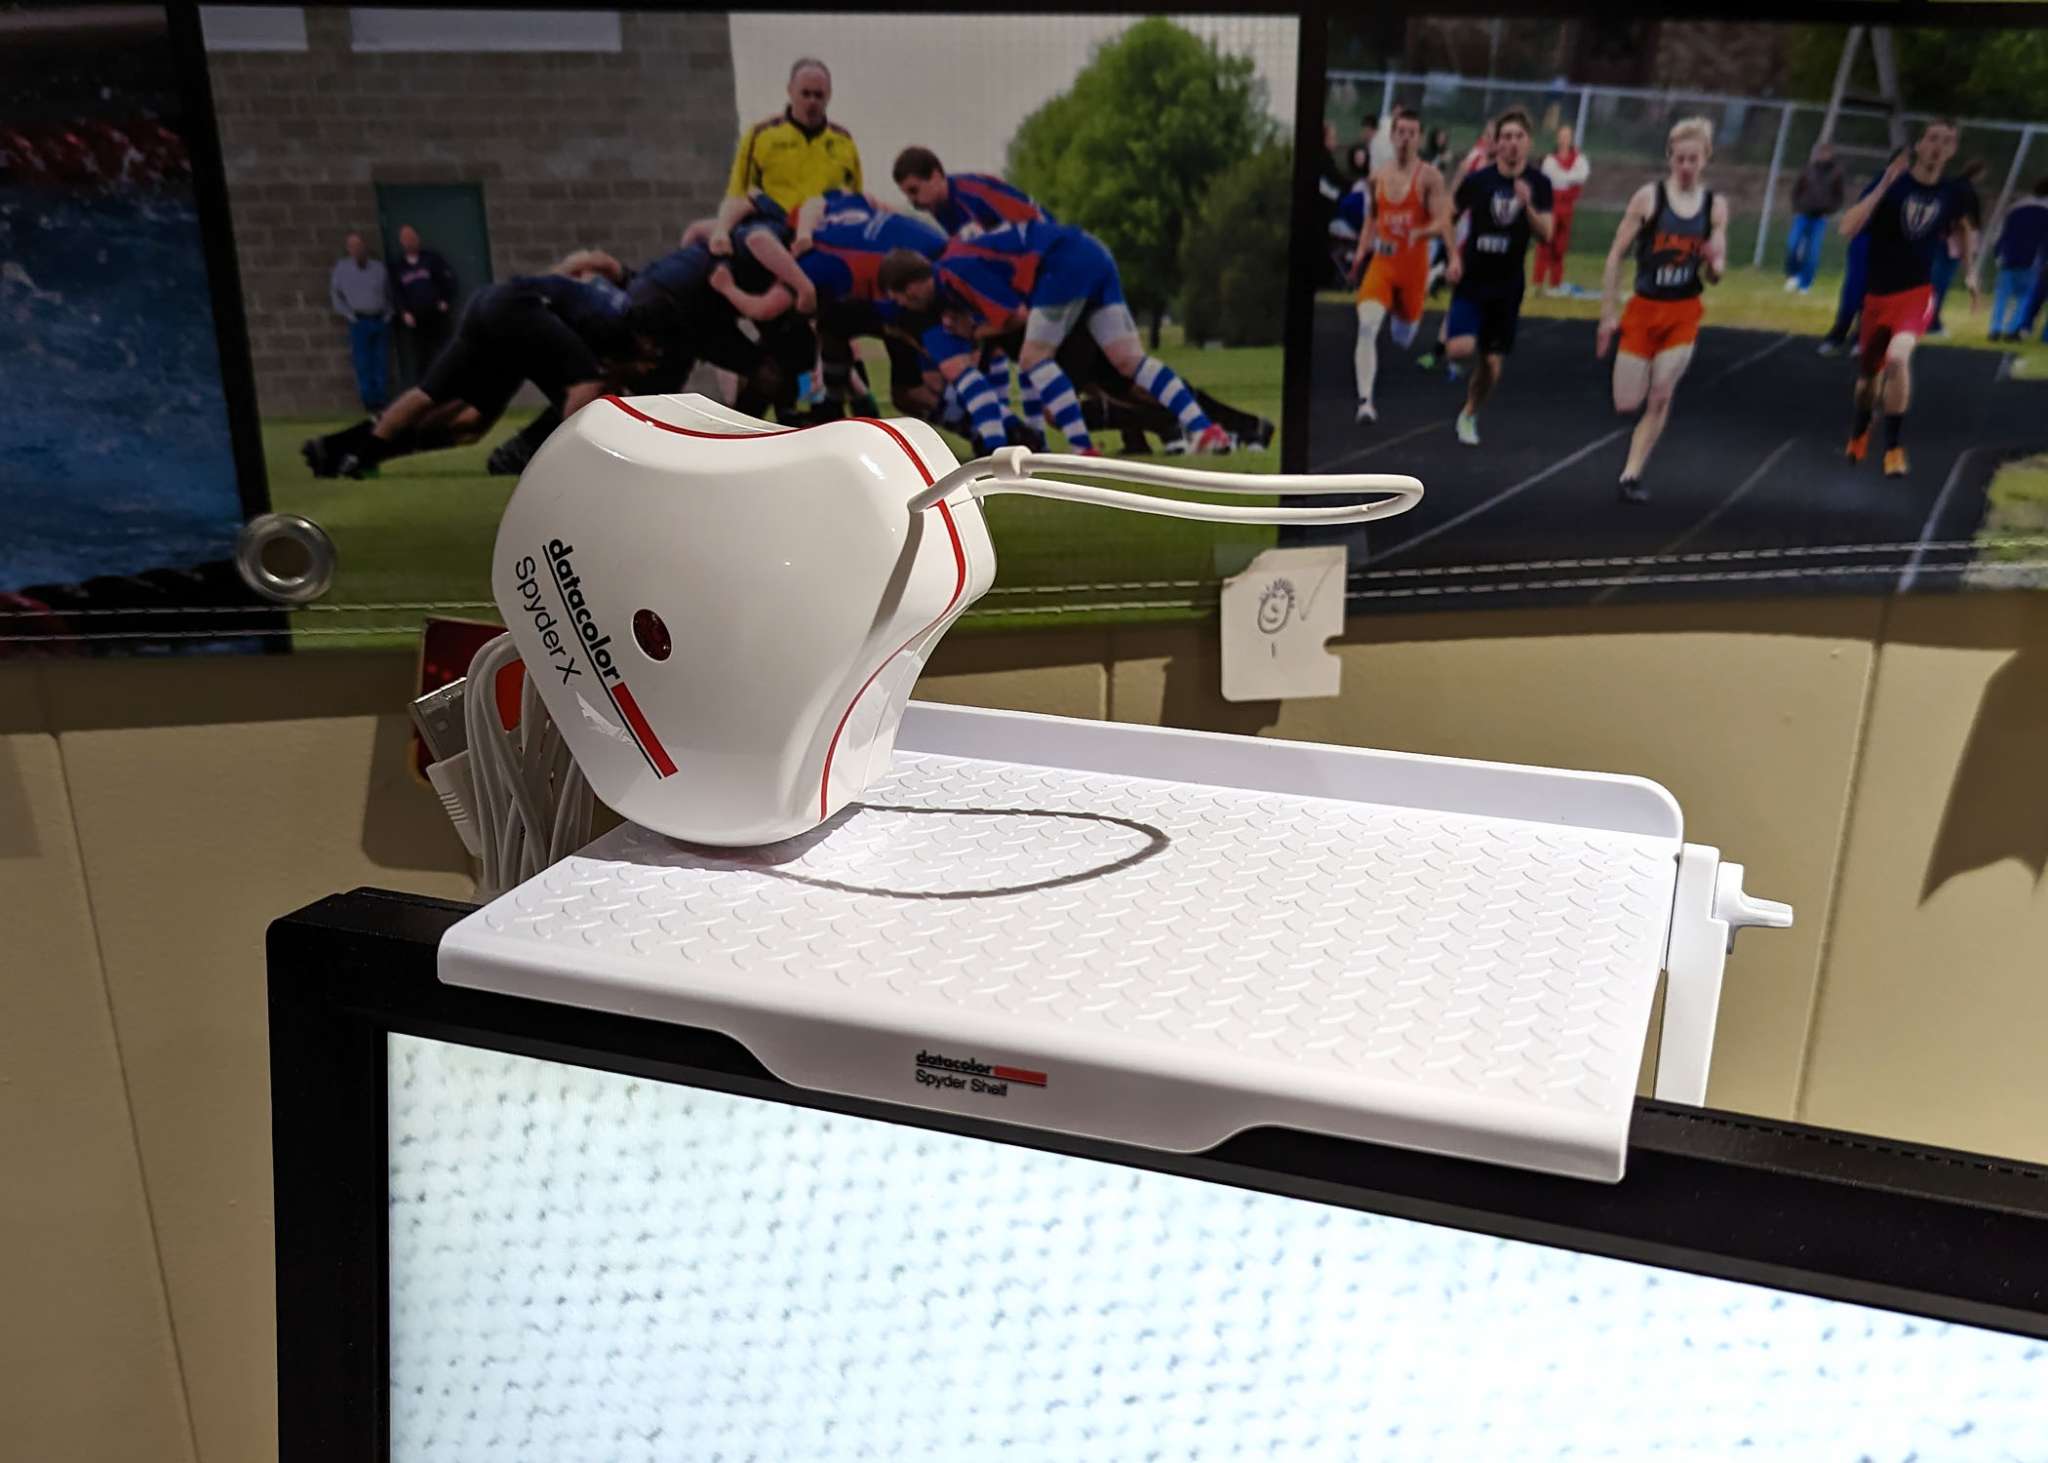
I used the integrated cap that is attached to the USB cable on the device as a counterbalance that I hung over the backside of the monitor. The cable will slide through the hole in the cover under tension to help you raise or lower the sensor to place it properly over the target. Note, you could also move the application window on the screen a bit if necessary to line things up. When you have things properly situated it will look something like the photo below.

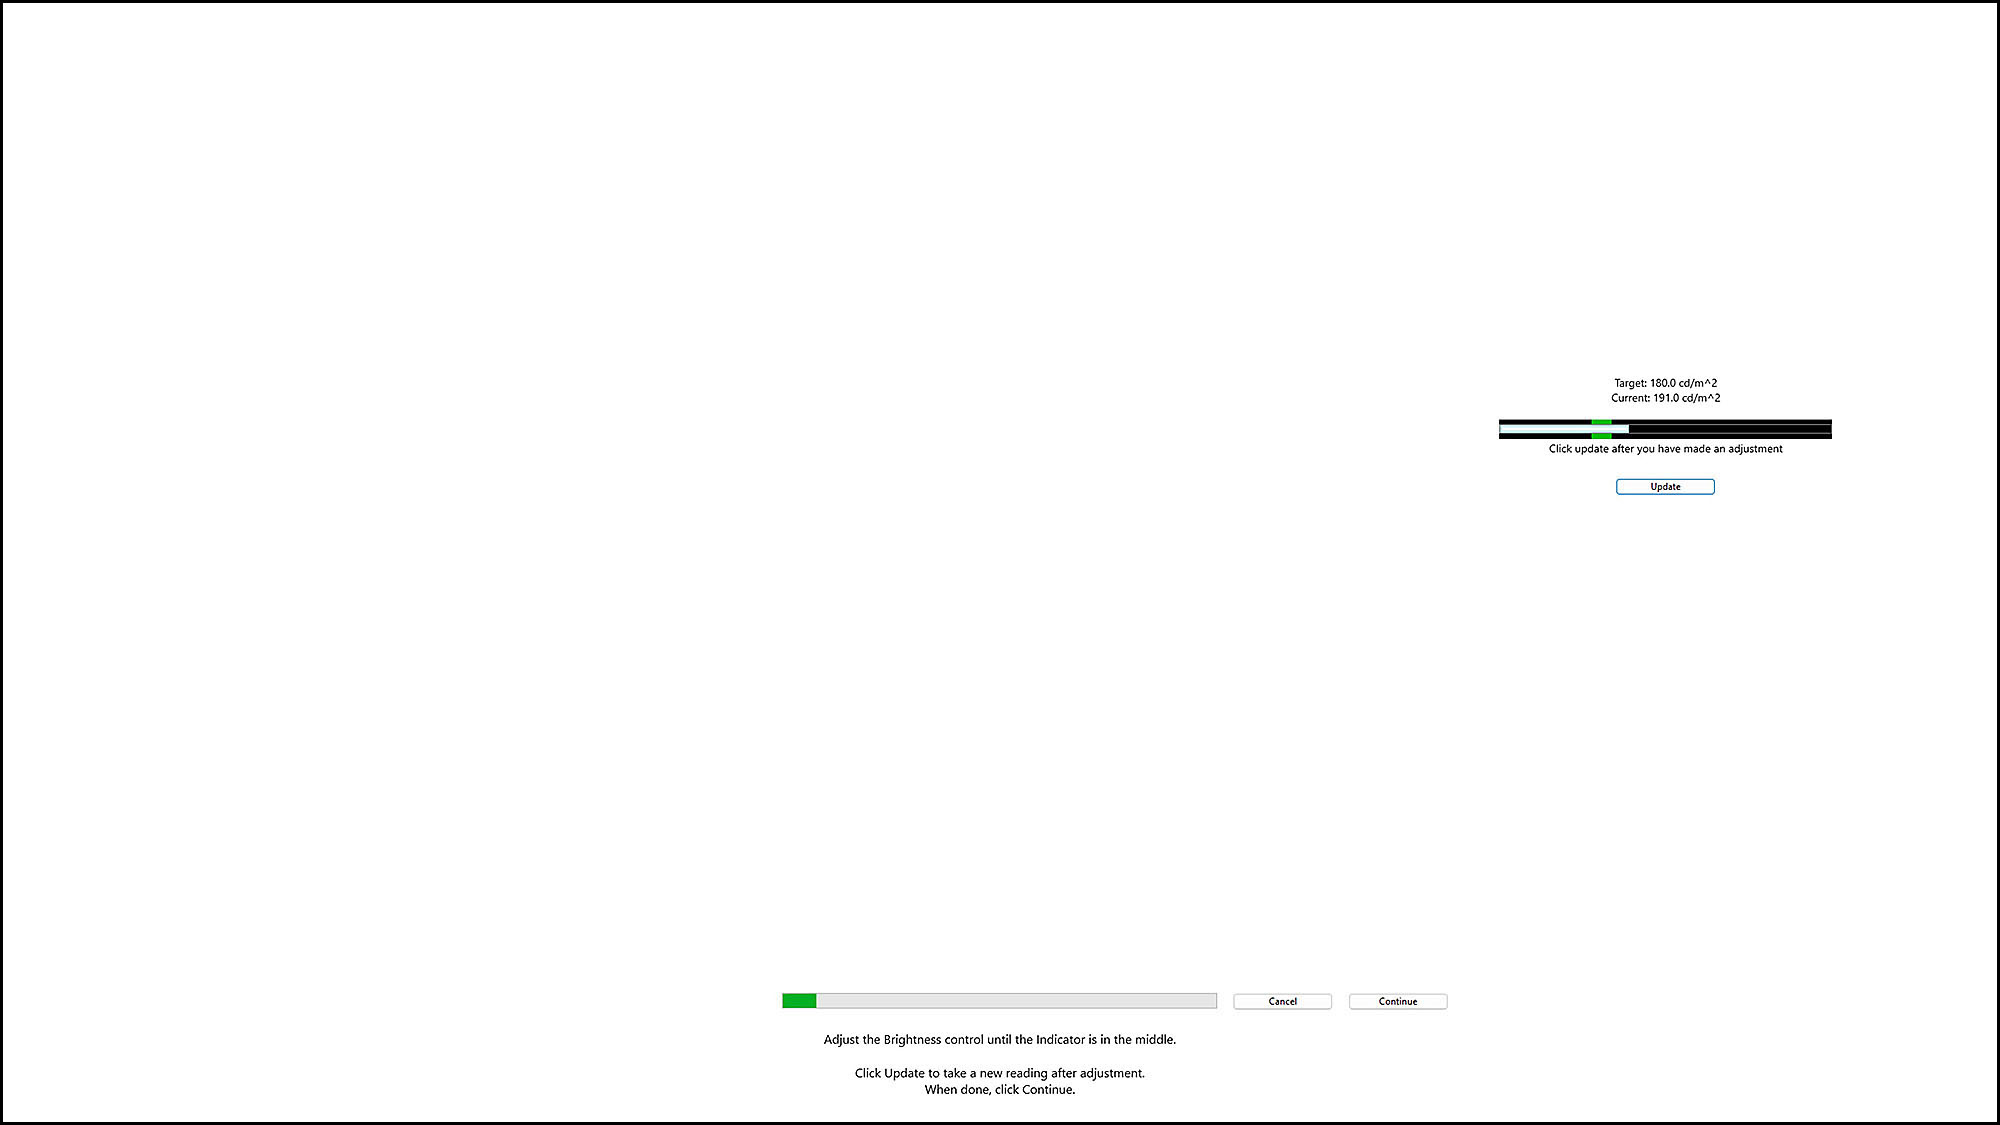
After clicking next a dialog pops up to inform you that you must stay with the machine a little bit longer. You will need to adjust the brightness level of the screen — which is a trial and error process. If the meter on the next page says the screen is too bright you will have to go into the screen menu and reduce brightness a bit and rerun the brightness test. This goes on until you get the brightness as close as possible to the target brightness of 180 cd/m^2.

After my initial run, the monitor reading was a bit on the high side (see below). After a couple of monitor brightness adjustments, I hit the target and the test proceeded.
The application and the colorimeter then ran through a series of color tests projected from the screen and read by the Spyder X Pro sensor. Once this process is complete I was given the chance to give the calibration a name — typically the name of the monitor or other identifying feature to tie the calibration setup to a specific screen for later recalibration use. The Spyder application will automatically set up the calibration for your computer and operating system so that the monitor you just calibrated gets the settings derived from this process every time you start your machine with screen attached. The interval between calibrations is configurable (I set mine at 2 months). Going forward, the Spyder app that runs in the system tray will remind me when my calibration has expired.
Over time monitors can have a slight color shift and need to be recalibrated.
I calibrated my BenQ EL2870-B 28″ 4K screen that I use as my primary screen for working on images in Photoshop, as well as the built-in 17″ screen on my ASUS ROG Strix G713QR gaming laptop. Full disclosure — not a gamer — this was just the most economical machine I could find in 2021 for the hardware specs I need to process a lot of images.
After calibrating both screens I examined the test image that comes with the application and found that it looked virtually identical on both screens. Since I ran the calibration I have processed several jobs and several hundred photos that were subsequently sent off for printing. I am finding the calibrated monitor view of the files and the printed version to look extremely close to each other. I can say without reservation that calibrating my two screens has greatly improved my confidence when I process and order hundreds of photos. If I get a batch of prints back from my printing service that does not look right, reprocessing and reprinting quickly gets into a lot of wasted time and money.
One of the accessories that come in the Spyder X Create Kit is the Spyder Shelf. When I first saw it in the box I thought it looked a little bit useless. The primary purpose of the shelf is to store the Spyder X pro in a convenient location. I cannot speak for anyone else, but if I get the calibration expiration warning and I can’t find my colorimeter or if it isn’t handy, I might be tempted to skip it. The shelf provides a handy spot to keep the device so that I will be more likely to stay on top of this. Don’t judge me. Also, there is extra space on the shelf for some other small items if you like.
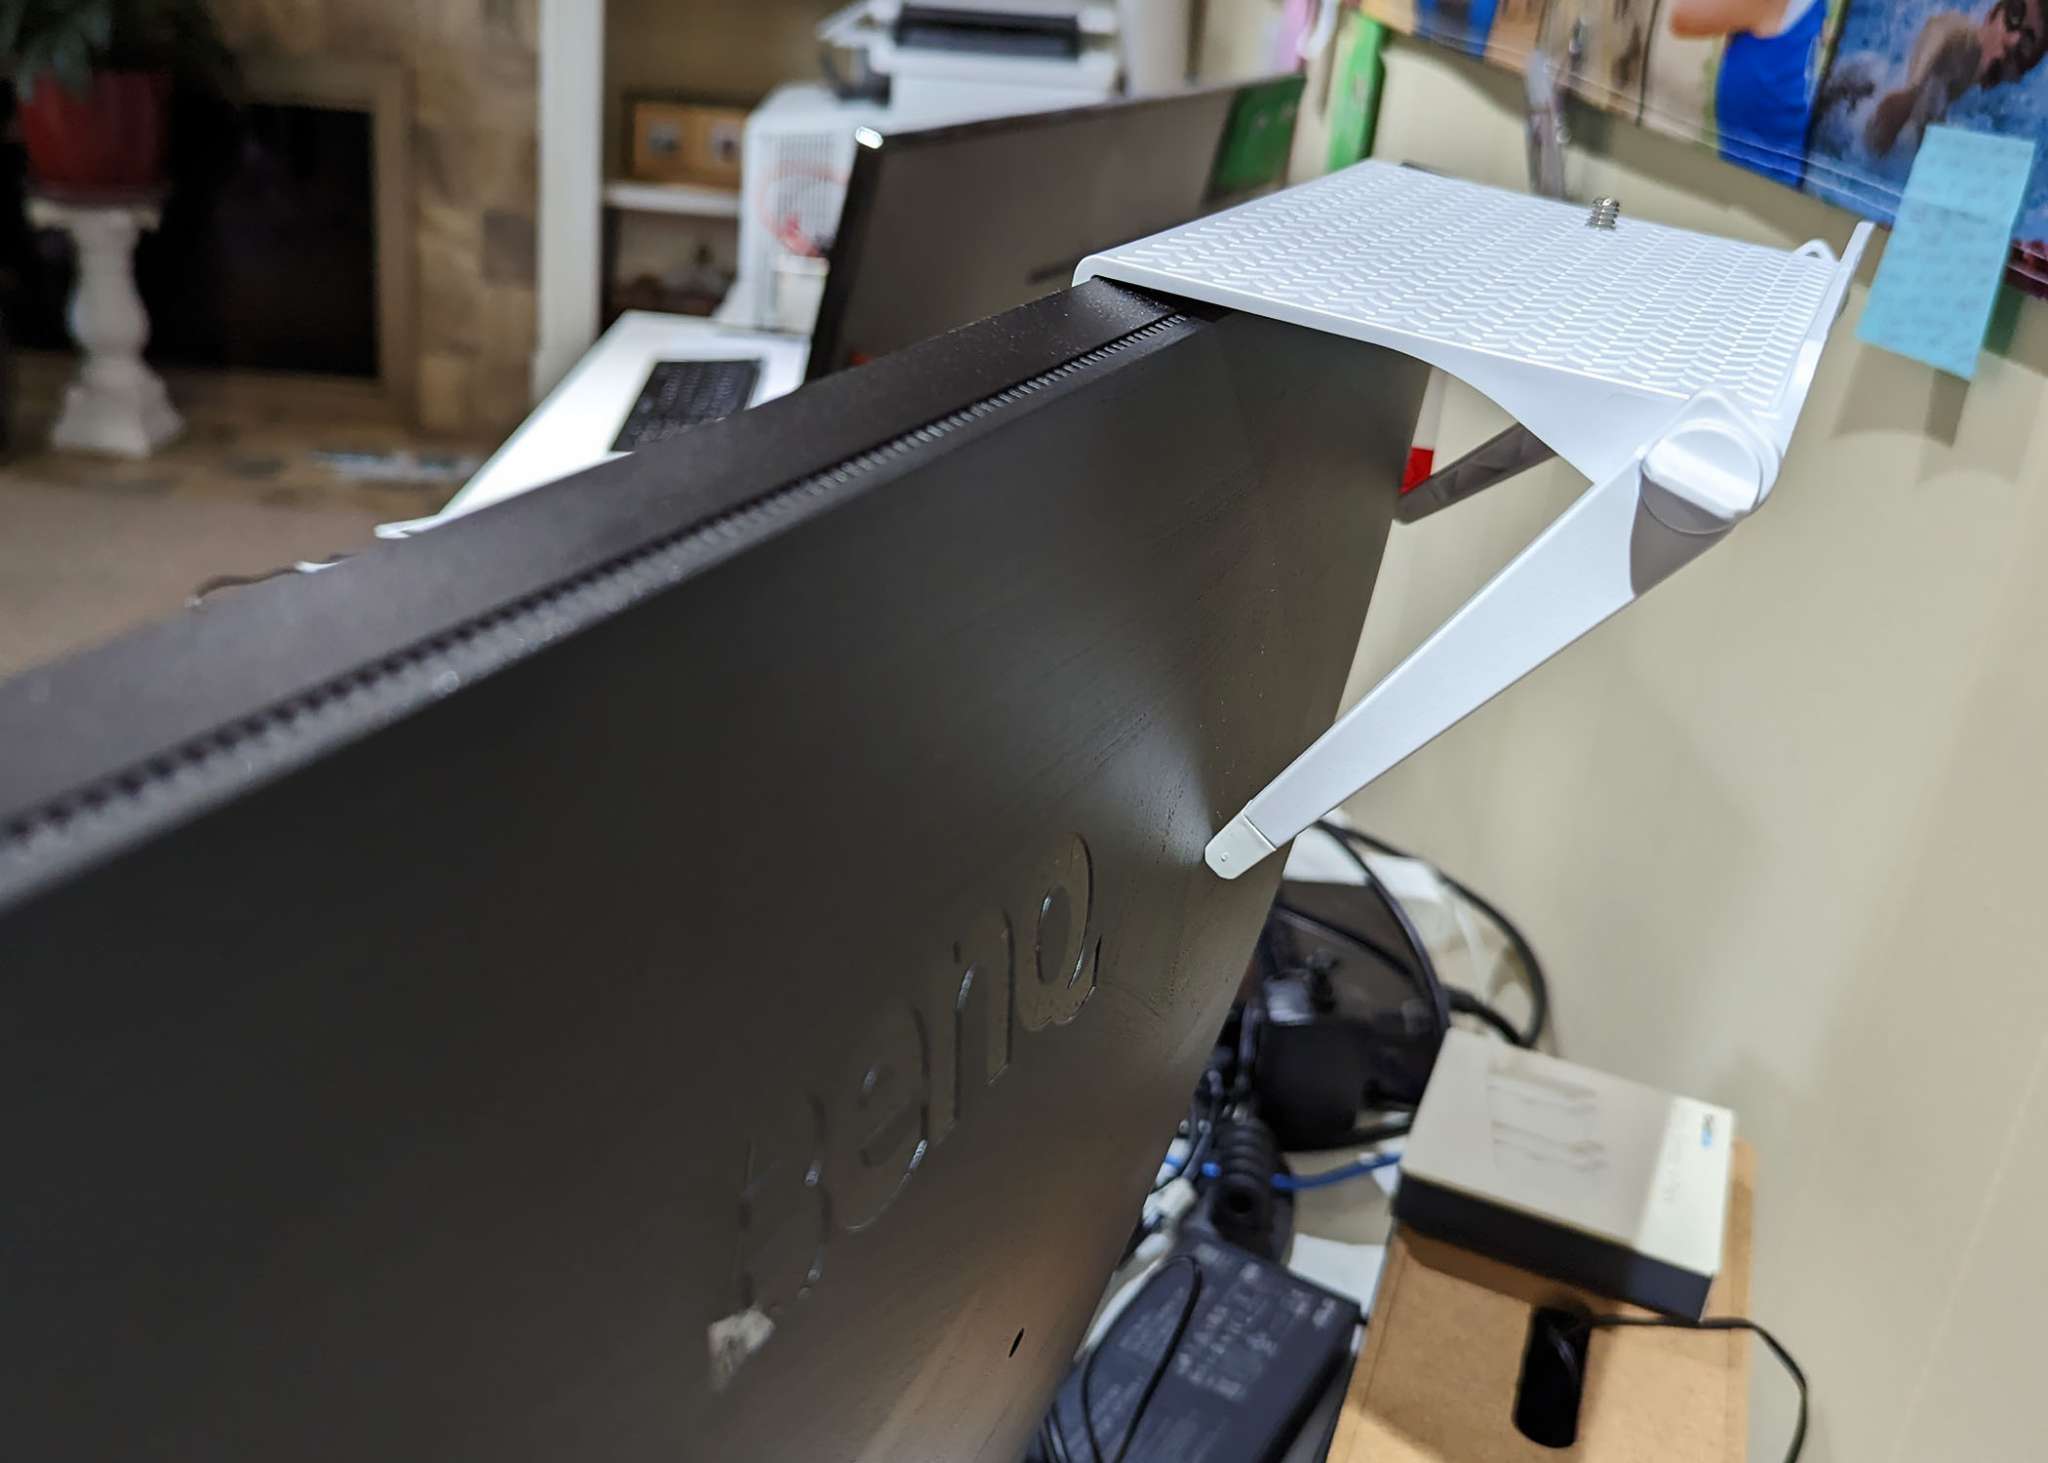
The shelf wraps around the top front corner of the monitor and has two independently adjustable legs on the back to account for the mostly weird geometry you tend to find on the backside of computer screens. My BenQ has a big bulge in the center and without the adjustable legs, I am sure the shelf would have been worthless to me.
I did not need the adapter or the tripod included with the kit. The adapter was to be used if your computer only has USB-C ports and I assume the tripod could be used as a way to store the Spyder X pro on your desktop as an alternative to the shelf. The device has a standard tripod threaded mount hole that mates up with the tripod or the screw mounted toward the left side of the Spyder Shelf. Any other possible purpose for the tripod in this context is lost on me.
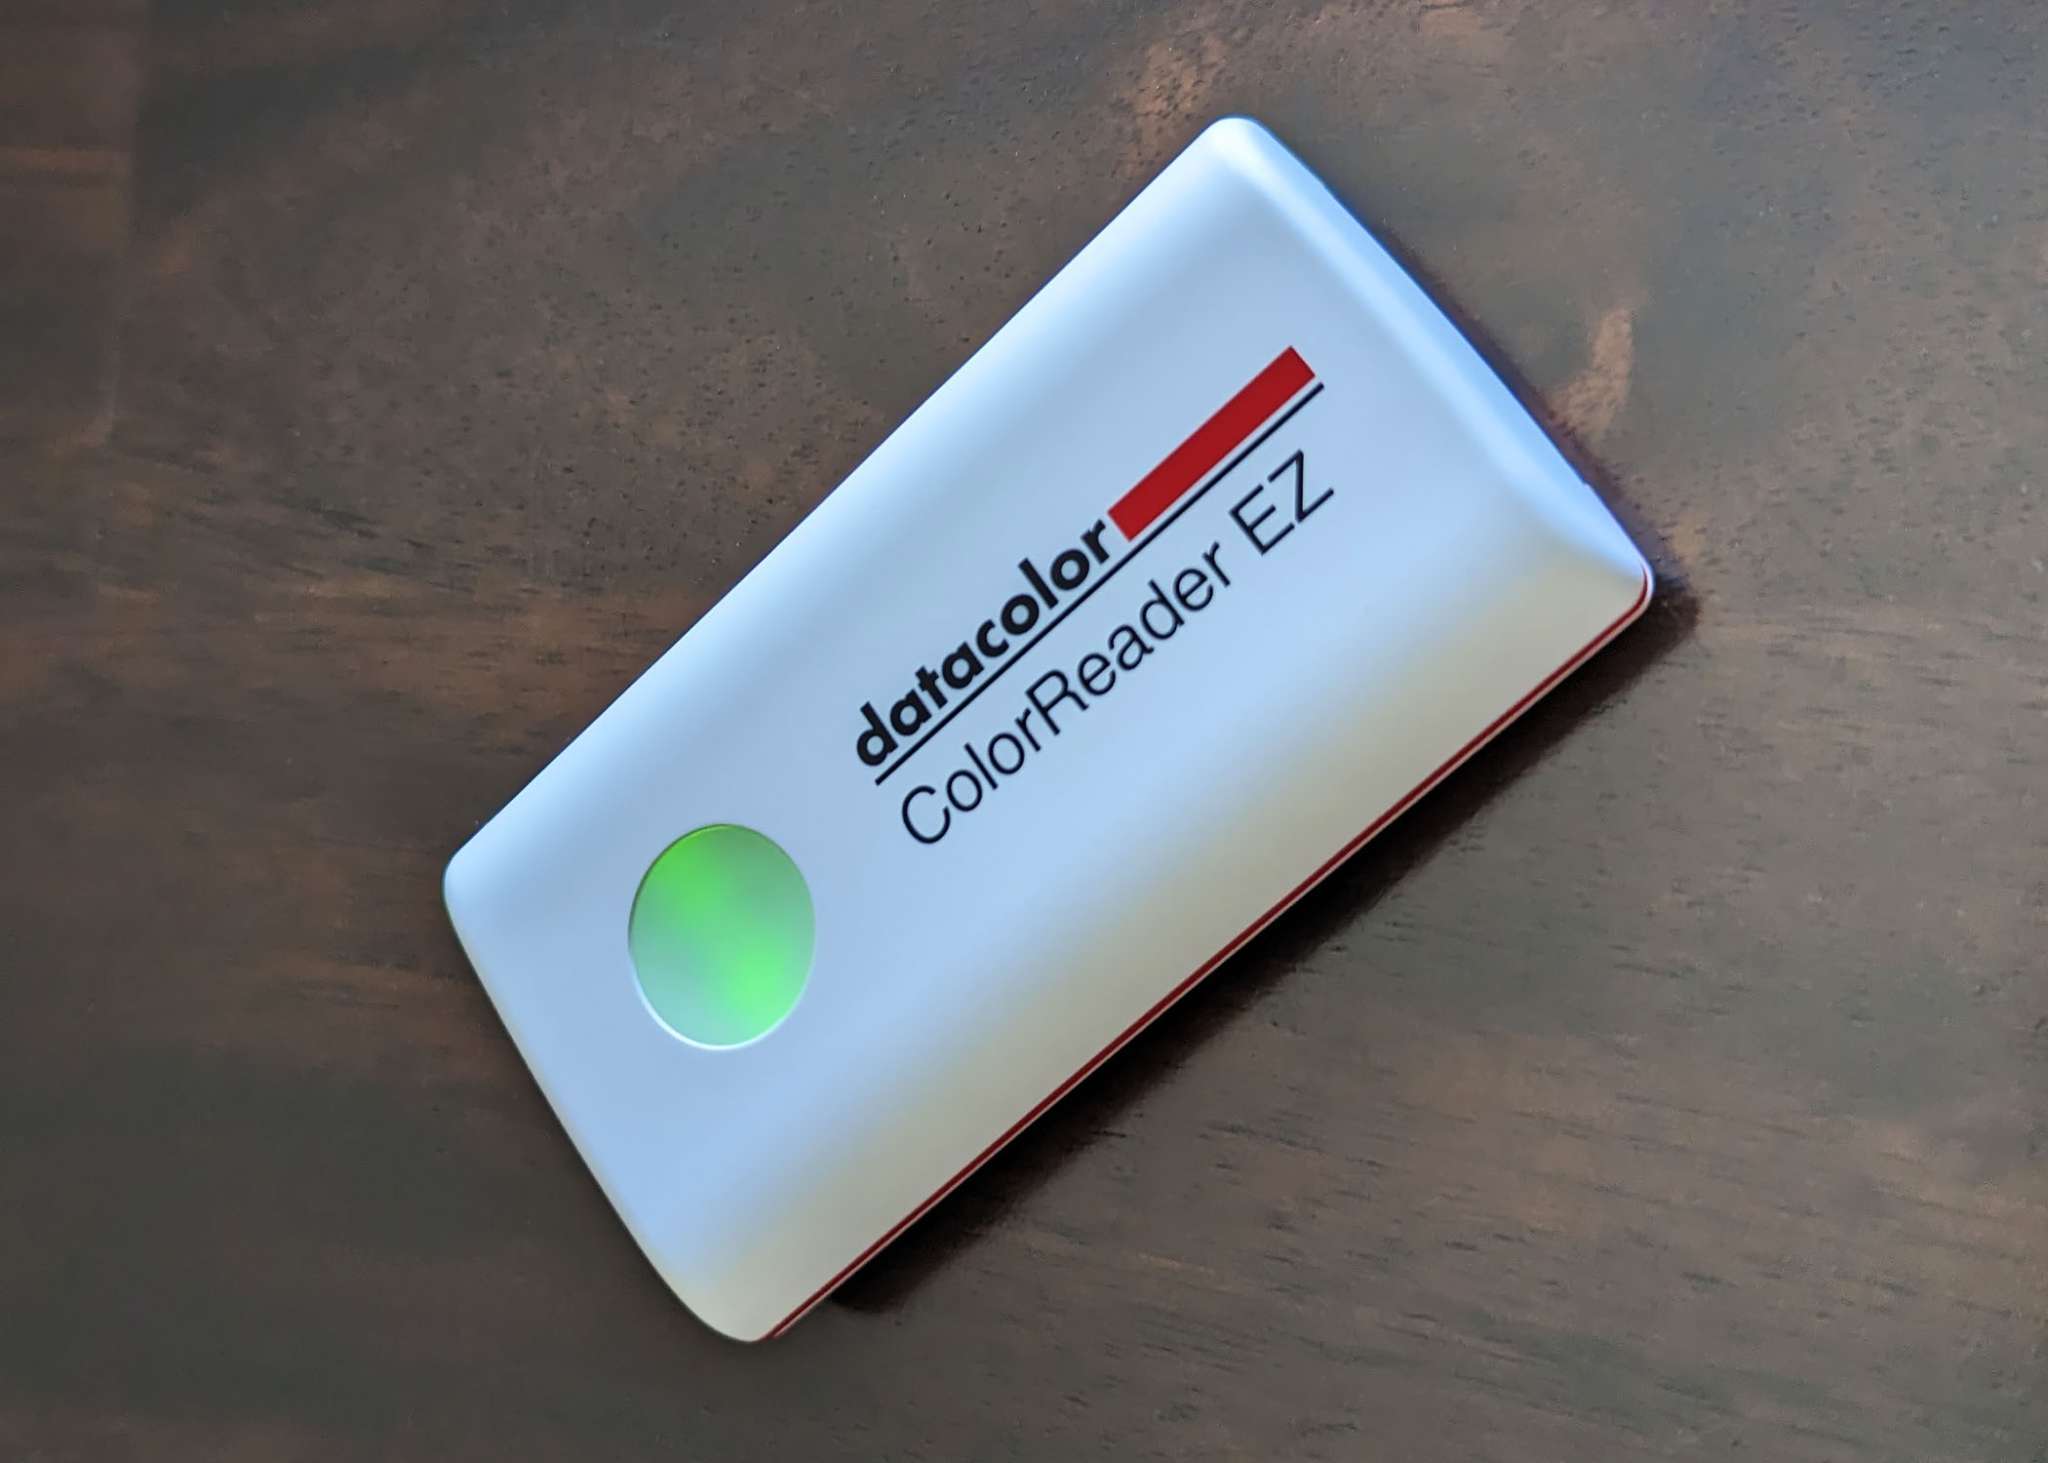
The last item included in the Spyder X Creator Kit is the ColorReader EZ.
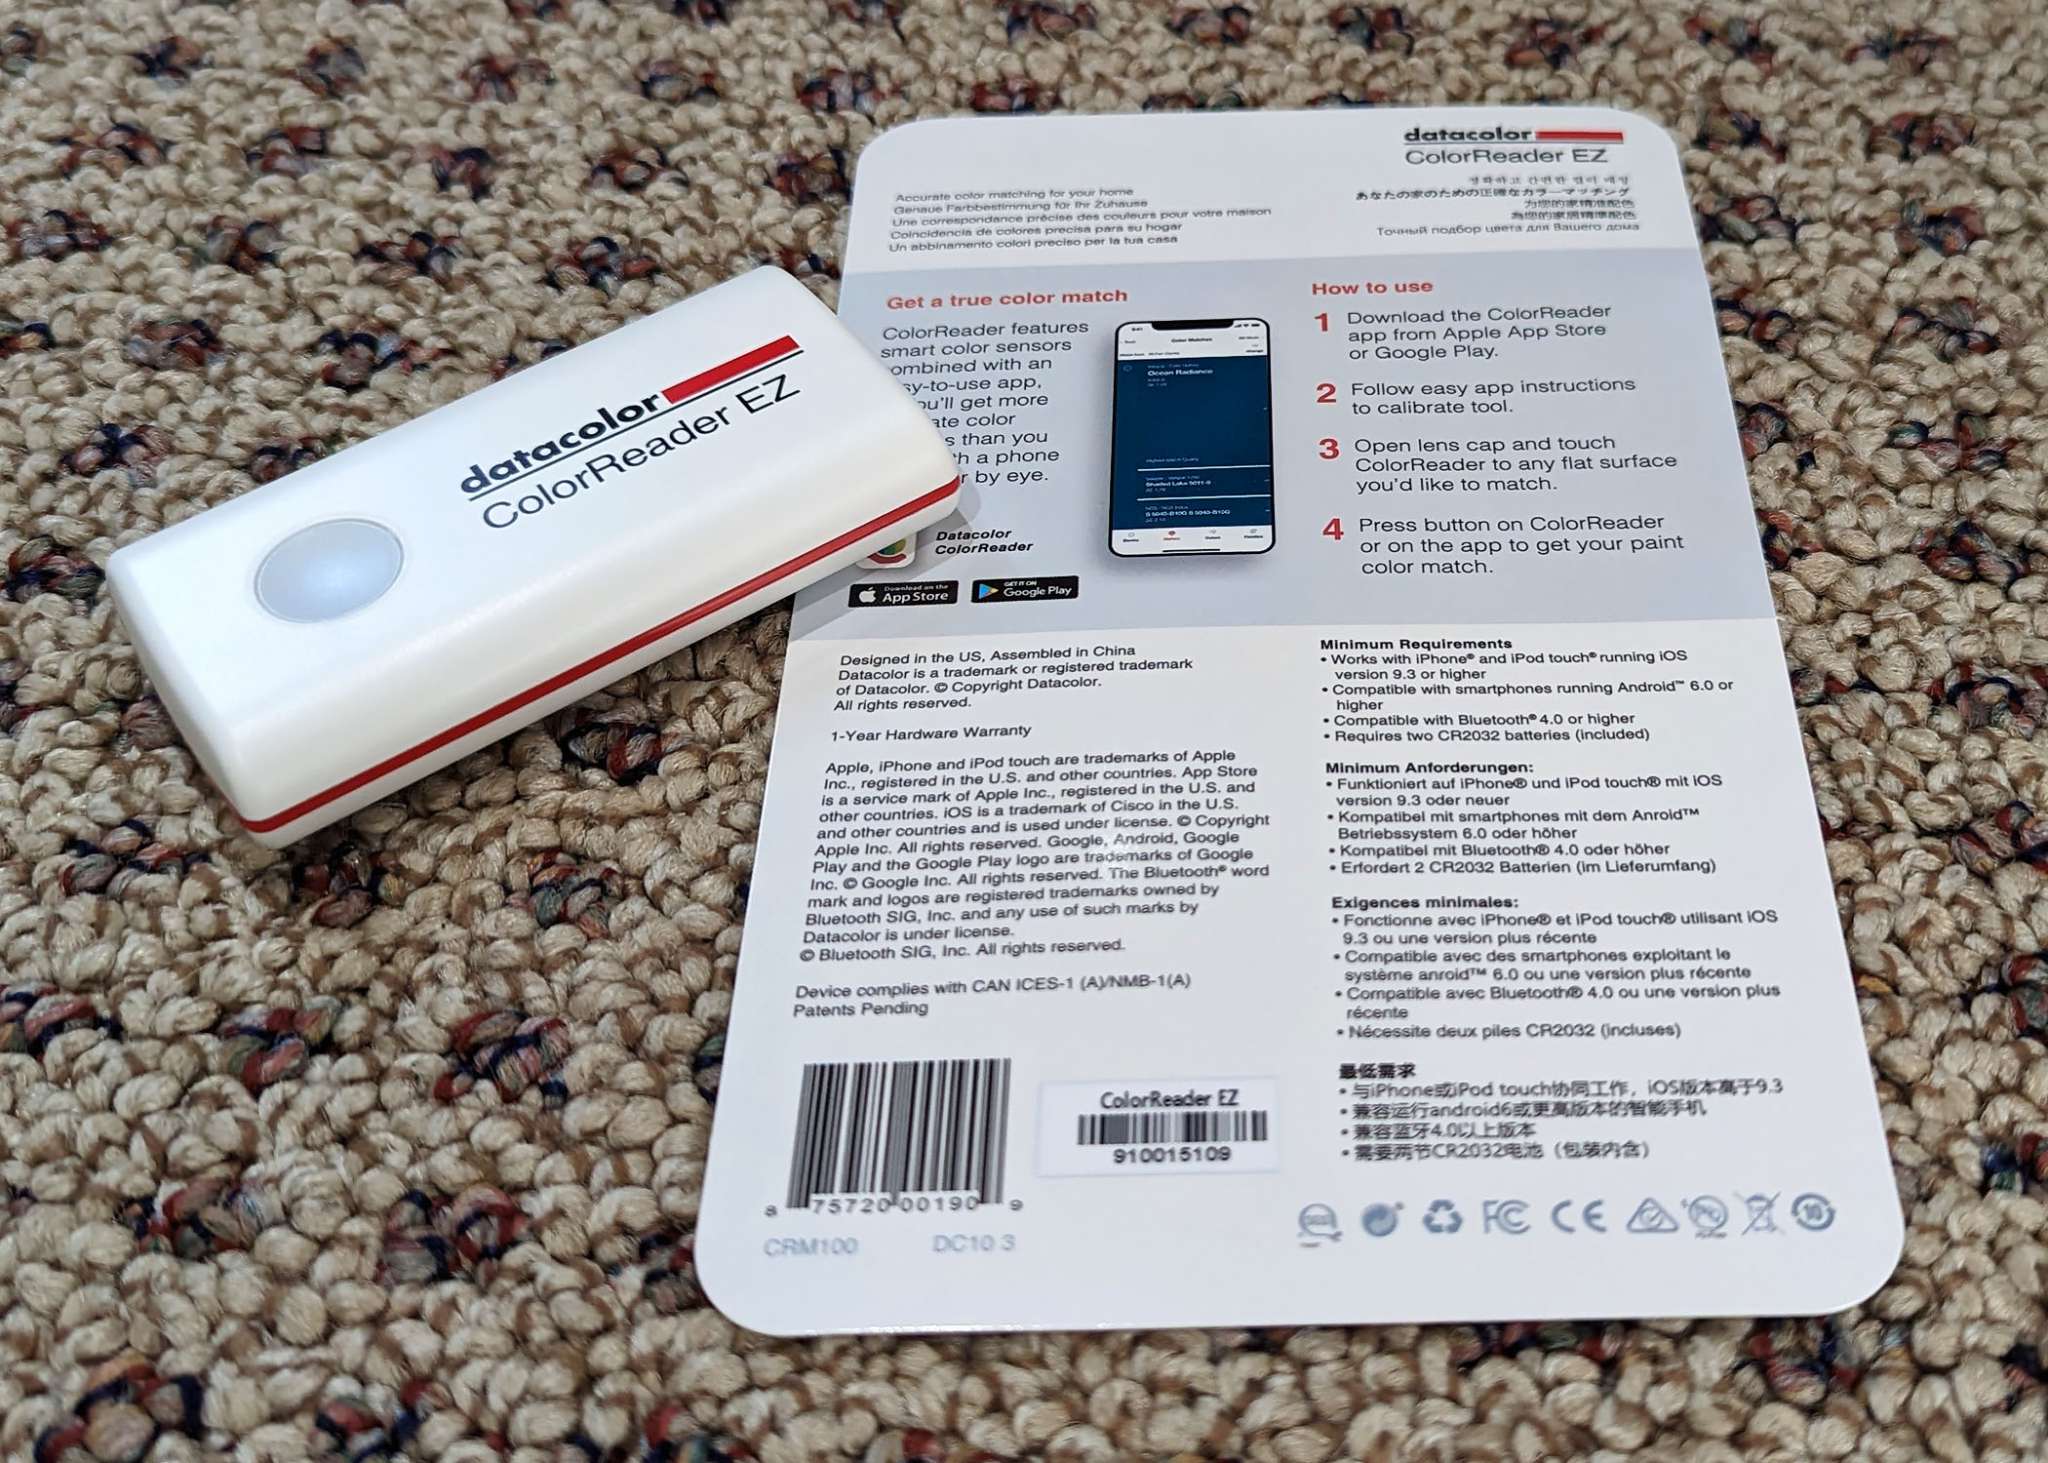
This little device pairs up with your Android or iPhone and allows you to take color readings. From the device description on Datacolor’s website:
Color often plays an essential role in photography, and the ColorReader EZ can be an invaluable tool for photographers and digital designers.
The portable, Bluetooth-enabled device lets you scan the color of any flat surface to accurately identify its closest Savage Universal background color, its top 3 paint color matches (across major paint brands) plus important color data such as CIE Lab, Hex and RGB for digital design work, including conversion to Pantone colors.
For photography purposes, I would see this device as more useful if one worked in fine art photography. My main line of camera work is volume photography (sports team and class photos), as well as action photography. Not much need to try and match up photos or graphics with wall colors. Having said that, my partner likes to change things around in our house on a fairly regular basis. As a matter of fact, she is currently working on a change to the wall color on the ground floor of our house. Because the ColorReader EZ lets you take a color reading from a wall and then match that against libraries of most major paint manufacturers, it is kind of a perfect tool for an interior decorator (professional or otherwise). Not only will the ColorReader app on your phone identify the color code or color name for your paint supplier of choice (we use Sherman Williams … OF COURSE!), but it also has a plethora of tools to help you find complementary colors using different methods. Let’s get into more detail.
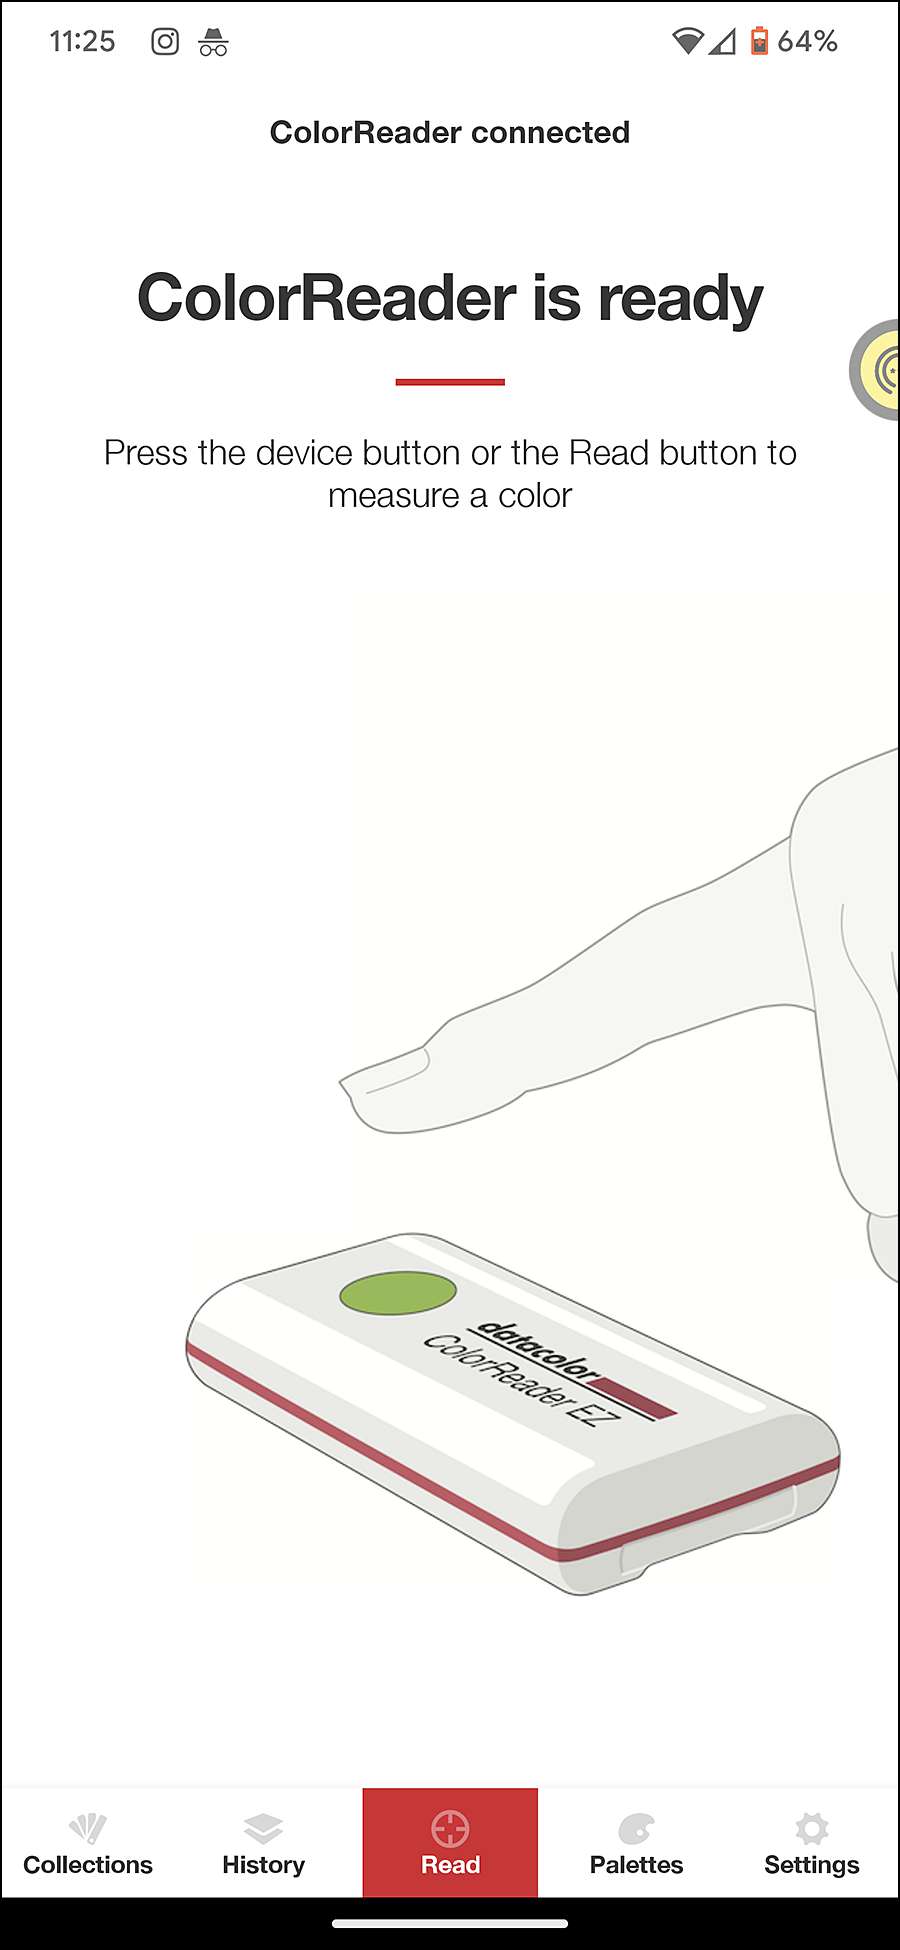
First I downloaded the ColorReader app from the Google Play Store and installed it on my Pixel 6. When you launch the app it instructs you to wake up the ColorReader.
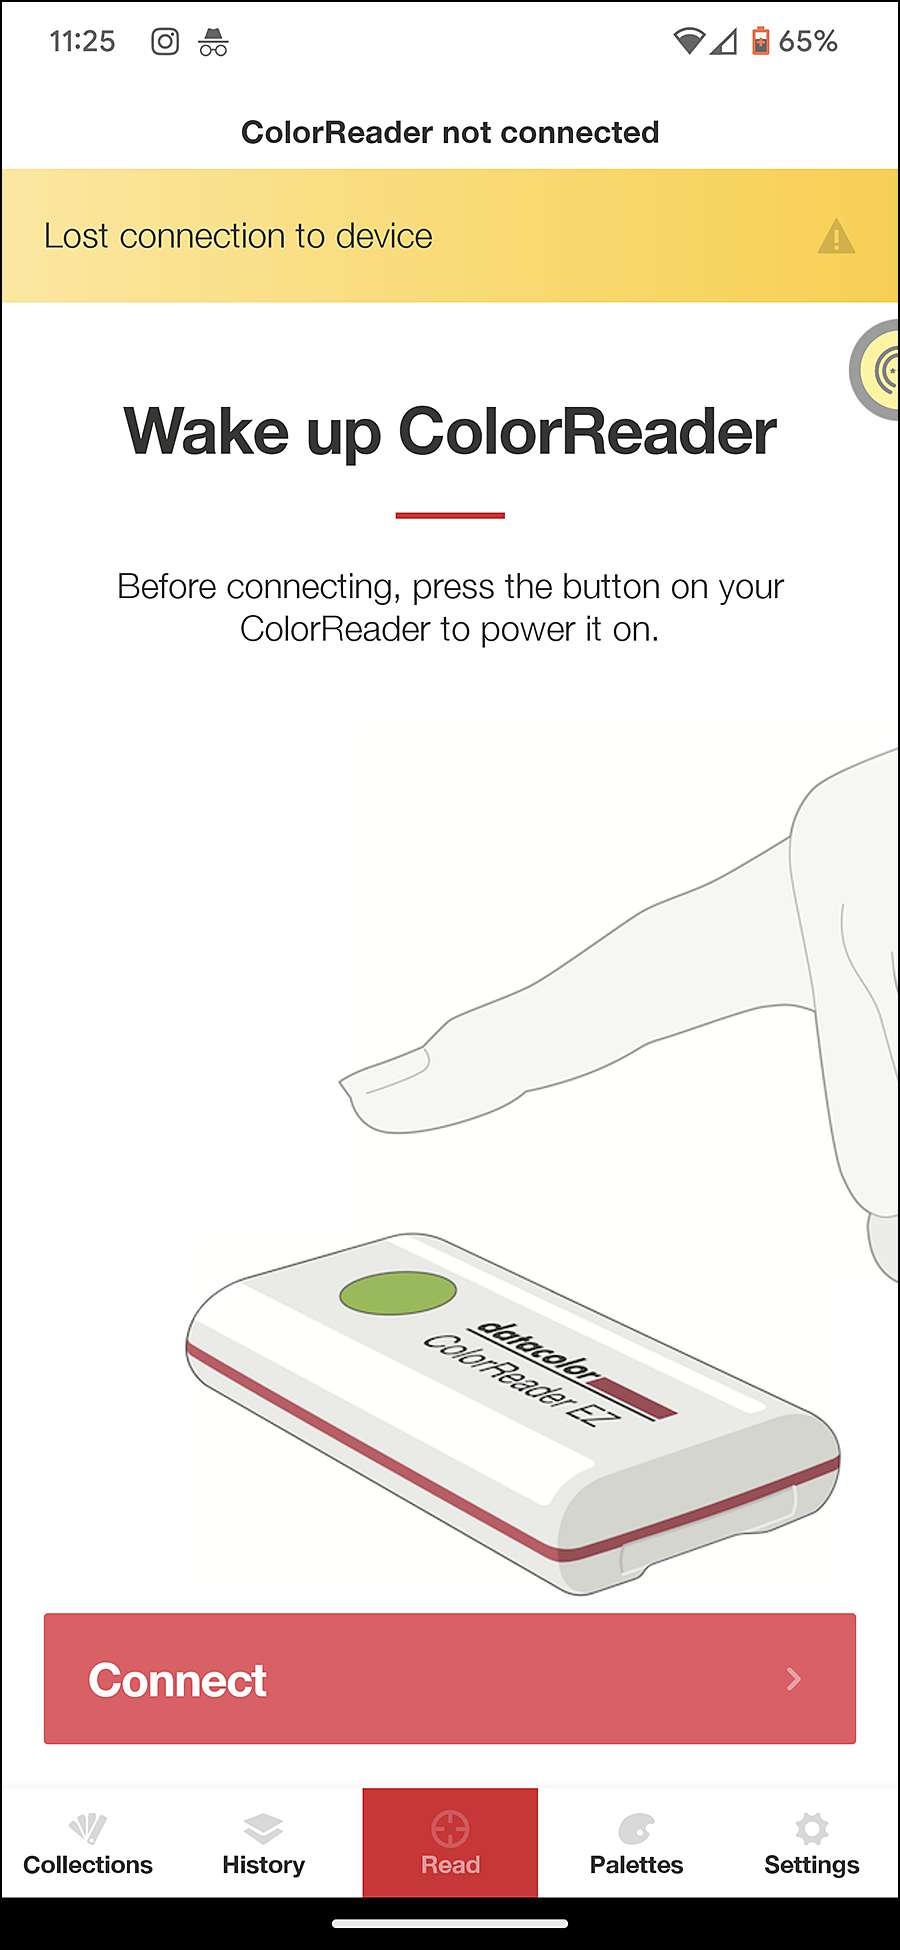
The ColorReader EZ is woken by pushing the button on the face of the device which then turns green.
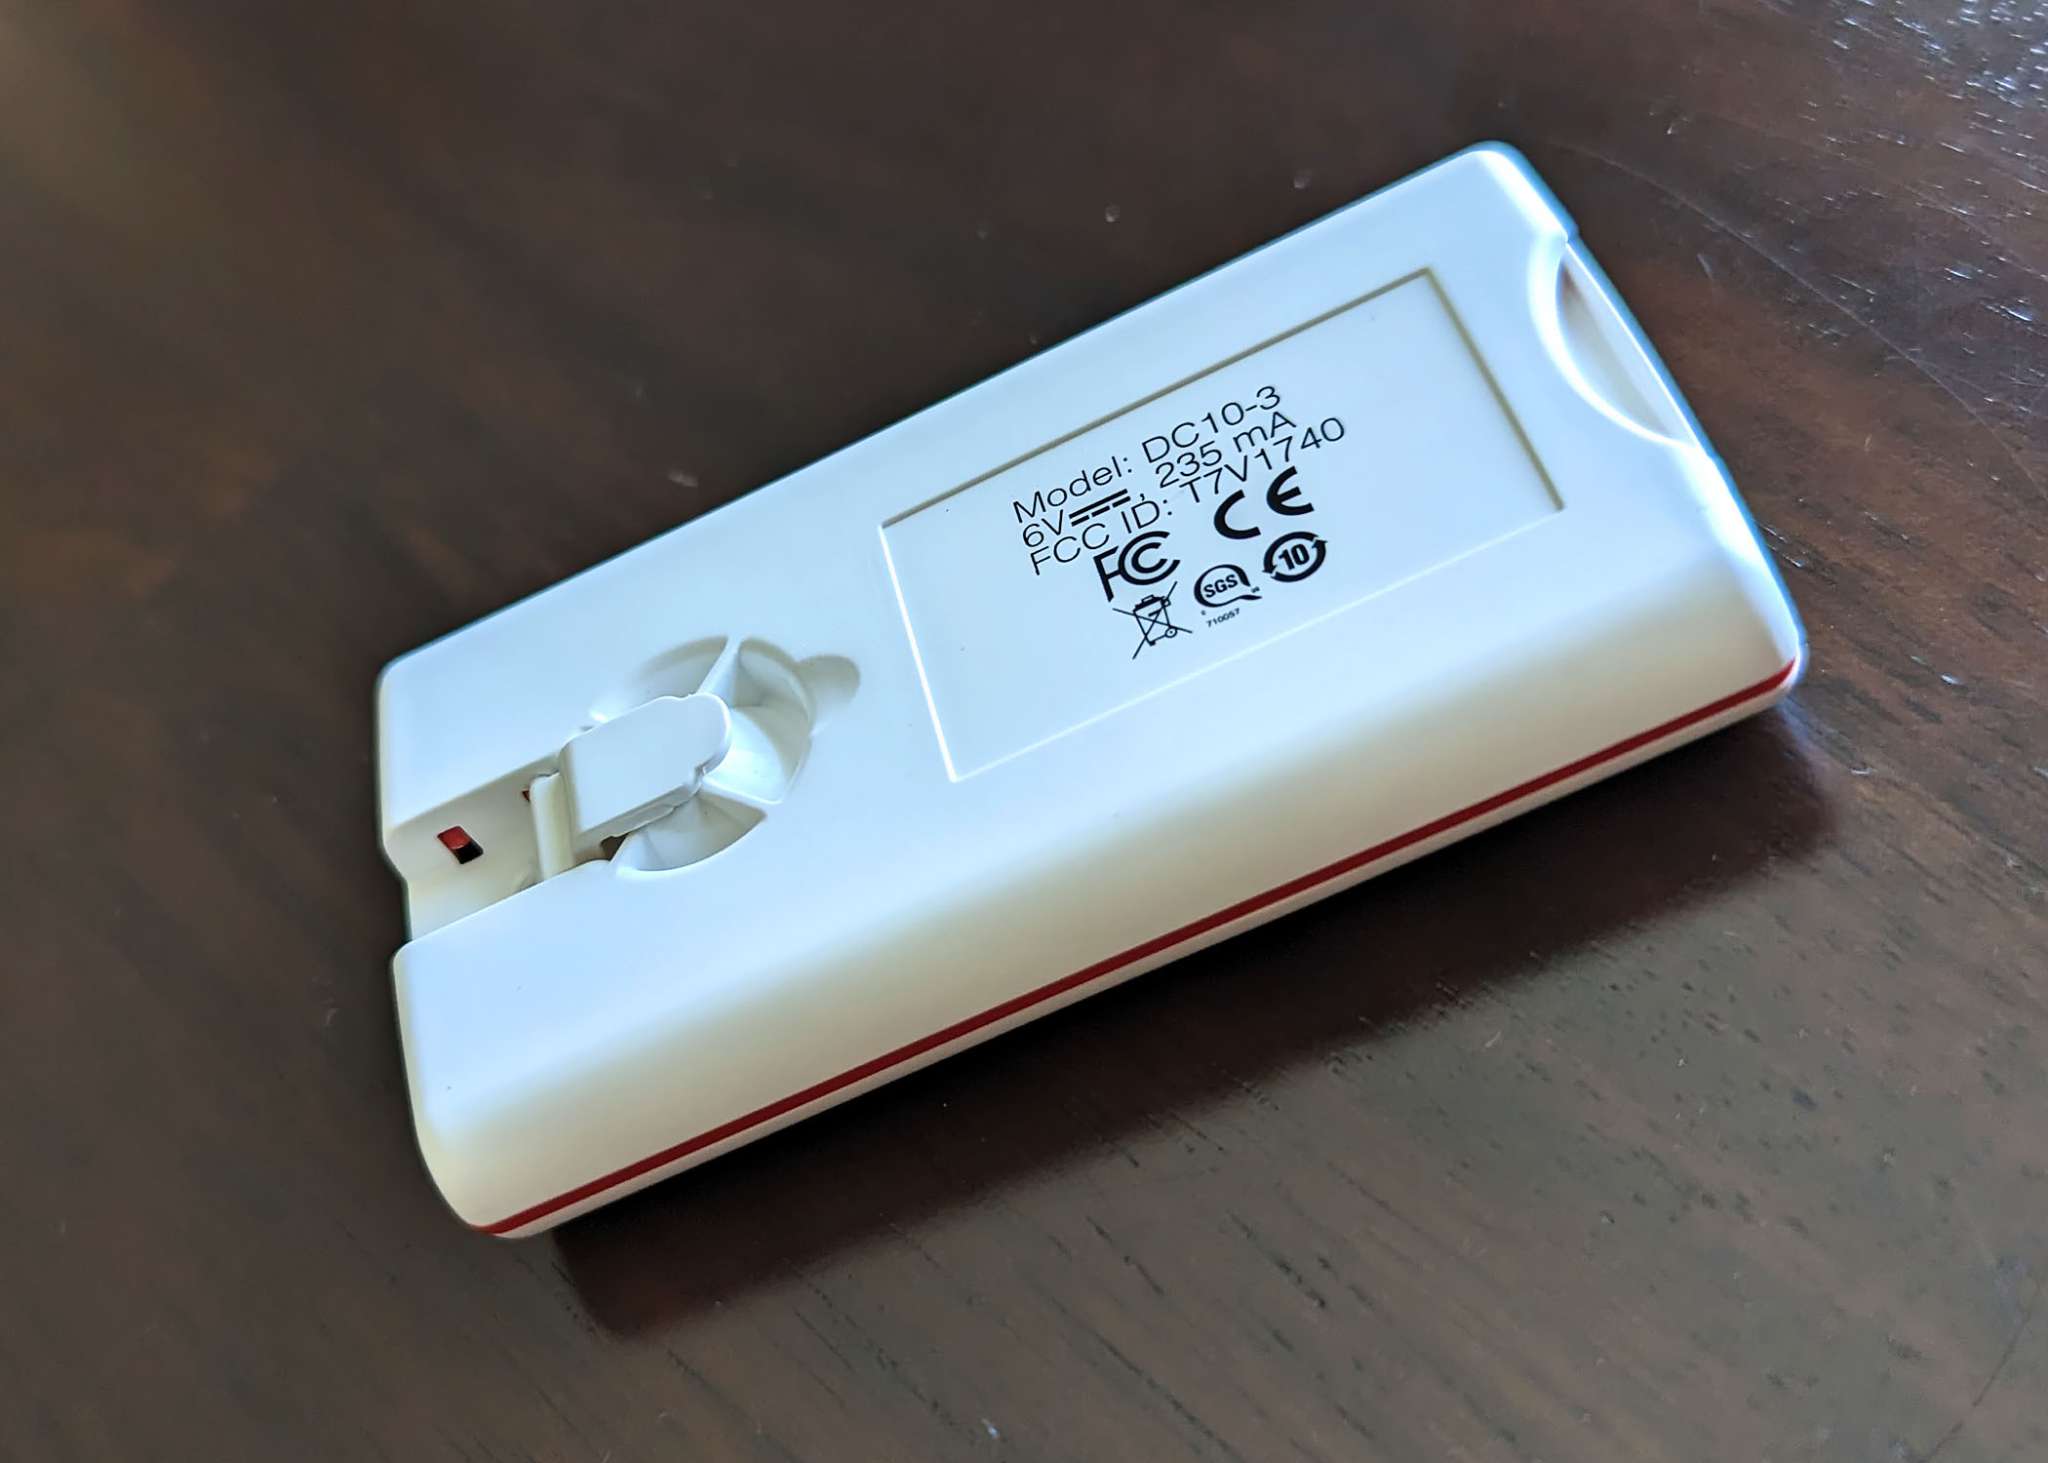
The first time you connect to the ColorReader EZ it will automatically ask you to calibrate the device. I failed to capture that screen, but it is pretty straightforward. You do have to make sure the little sensor protective flap (which also serves as a baseline color to calibrate the device) is closed as shown below.
Once calibration is complete, the ColorReader app will cheerfully tell you the ColorReader is ready.
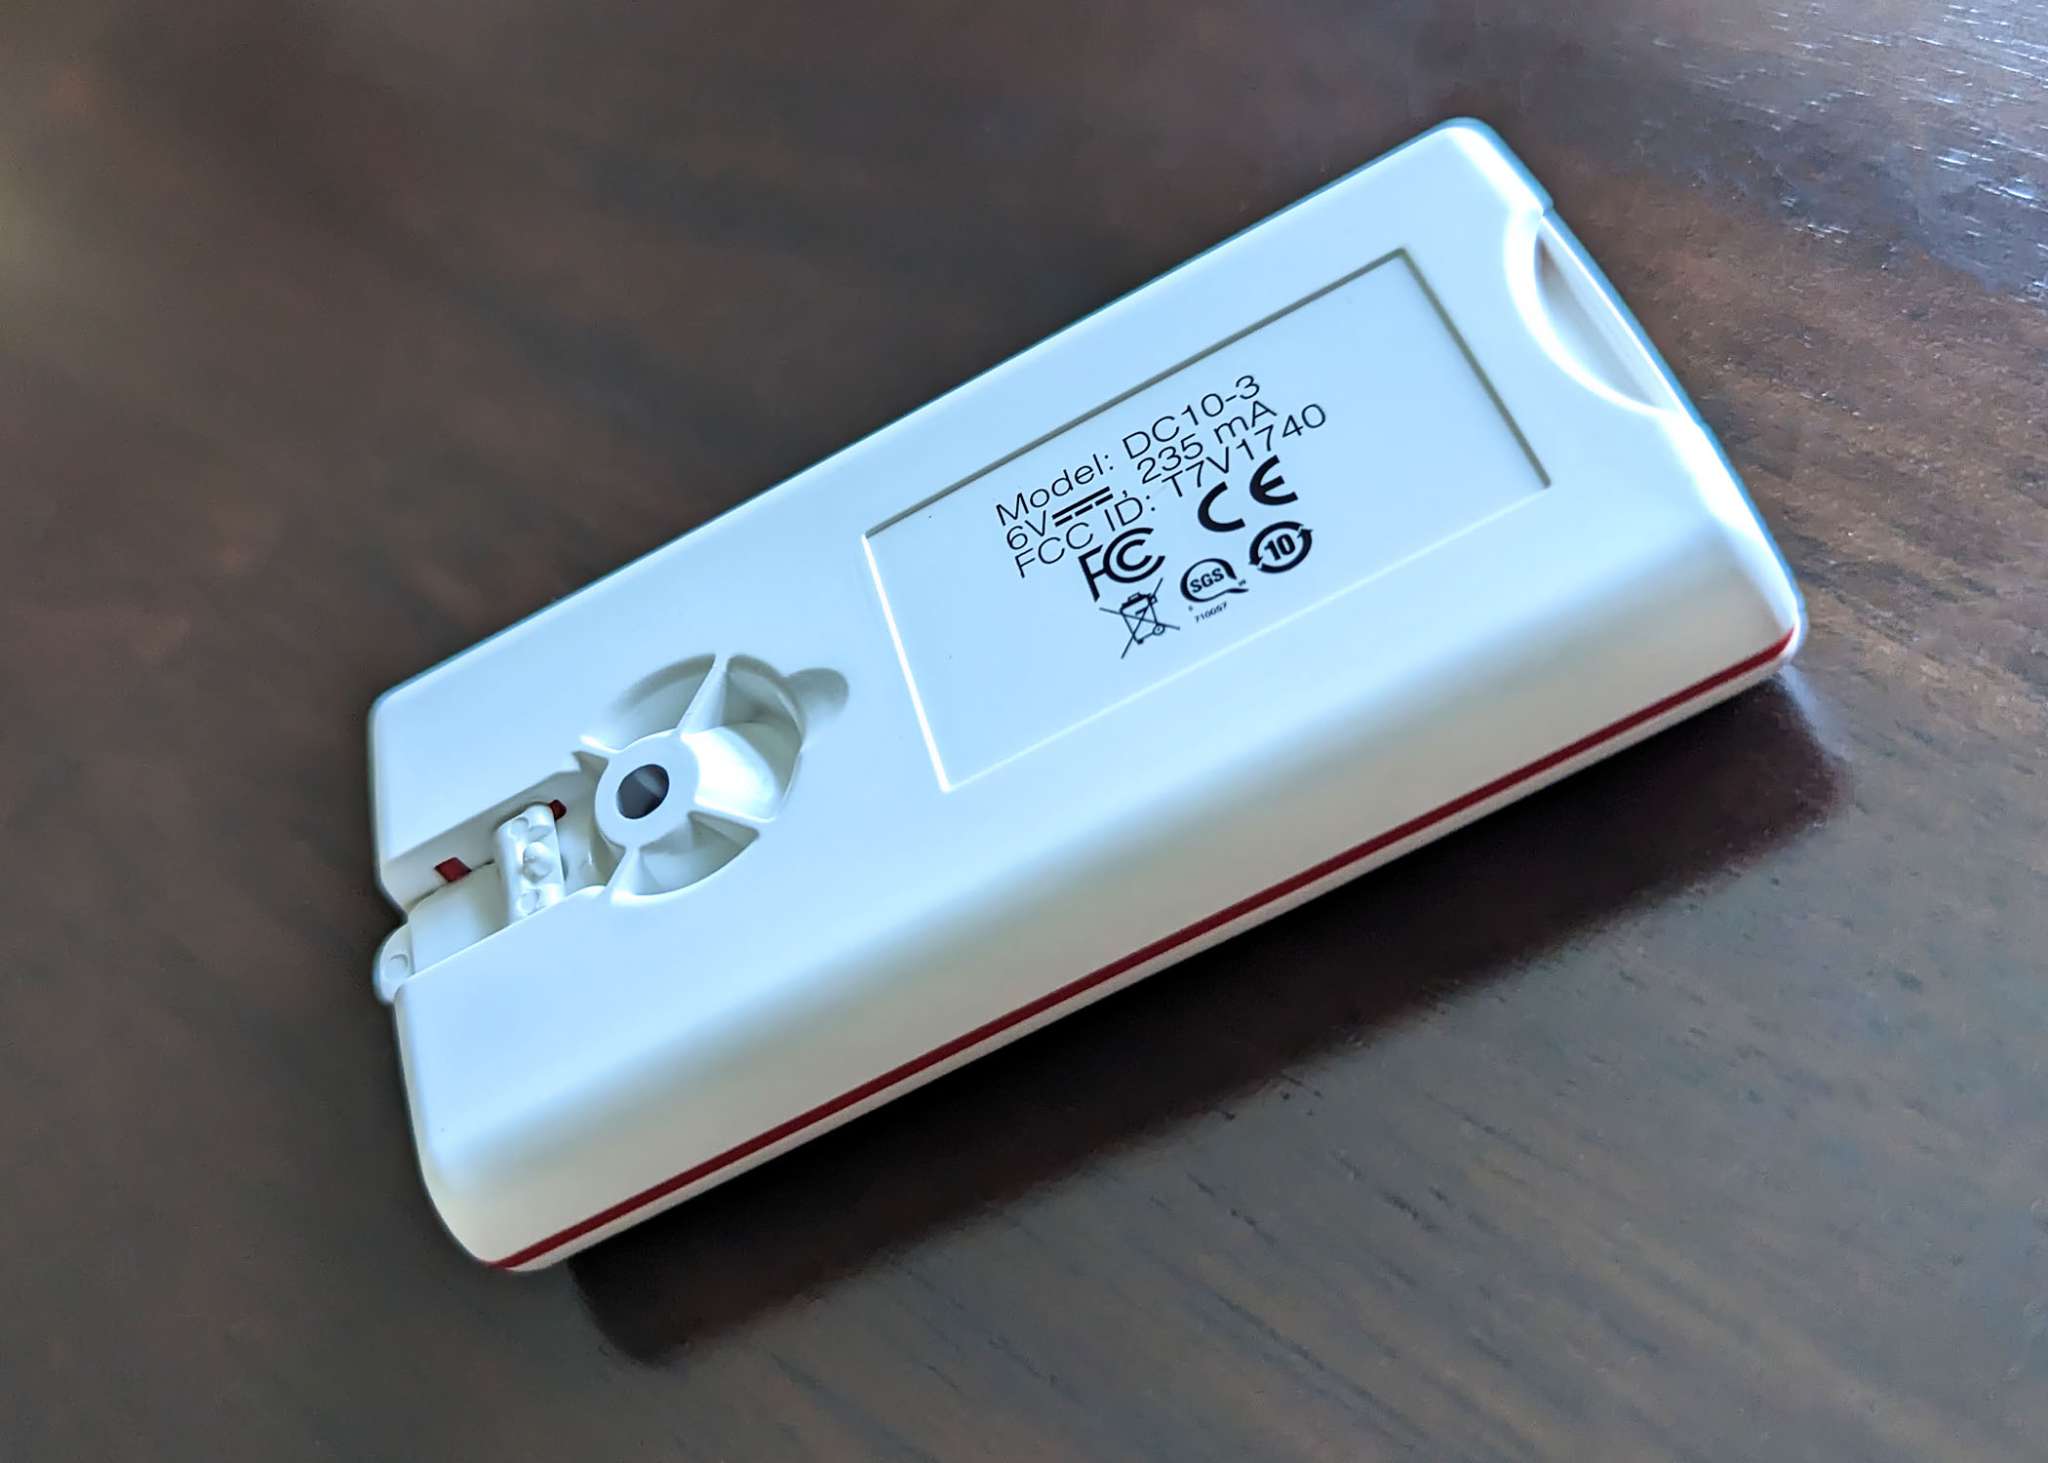
After opening and locking the protective flap as shown below, you may begin taking color readings.
Before taking a reading, I recommend you go into the settings and select whichever manufacturer’s color collections make sense in terms of what type of paint you will be using. I selected the three available Sherwin Williams collections. The first photo below shows no collections activated. The second photo shows the three collections I activated in red.
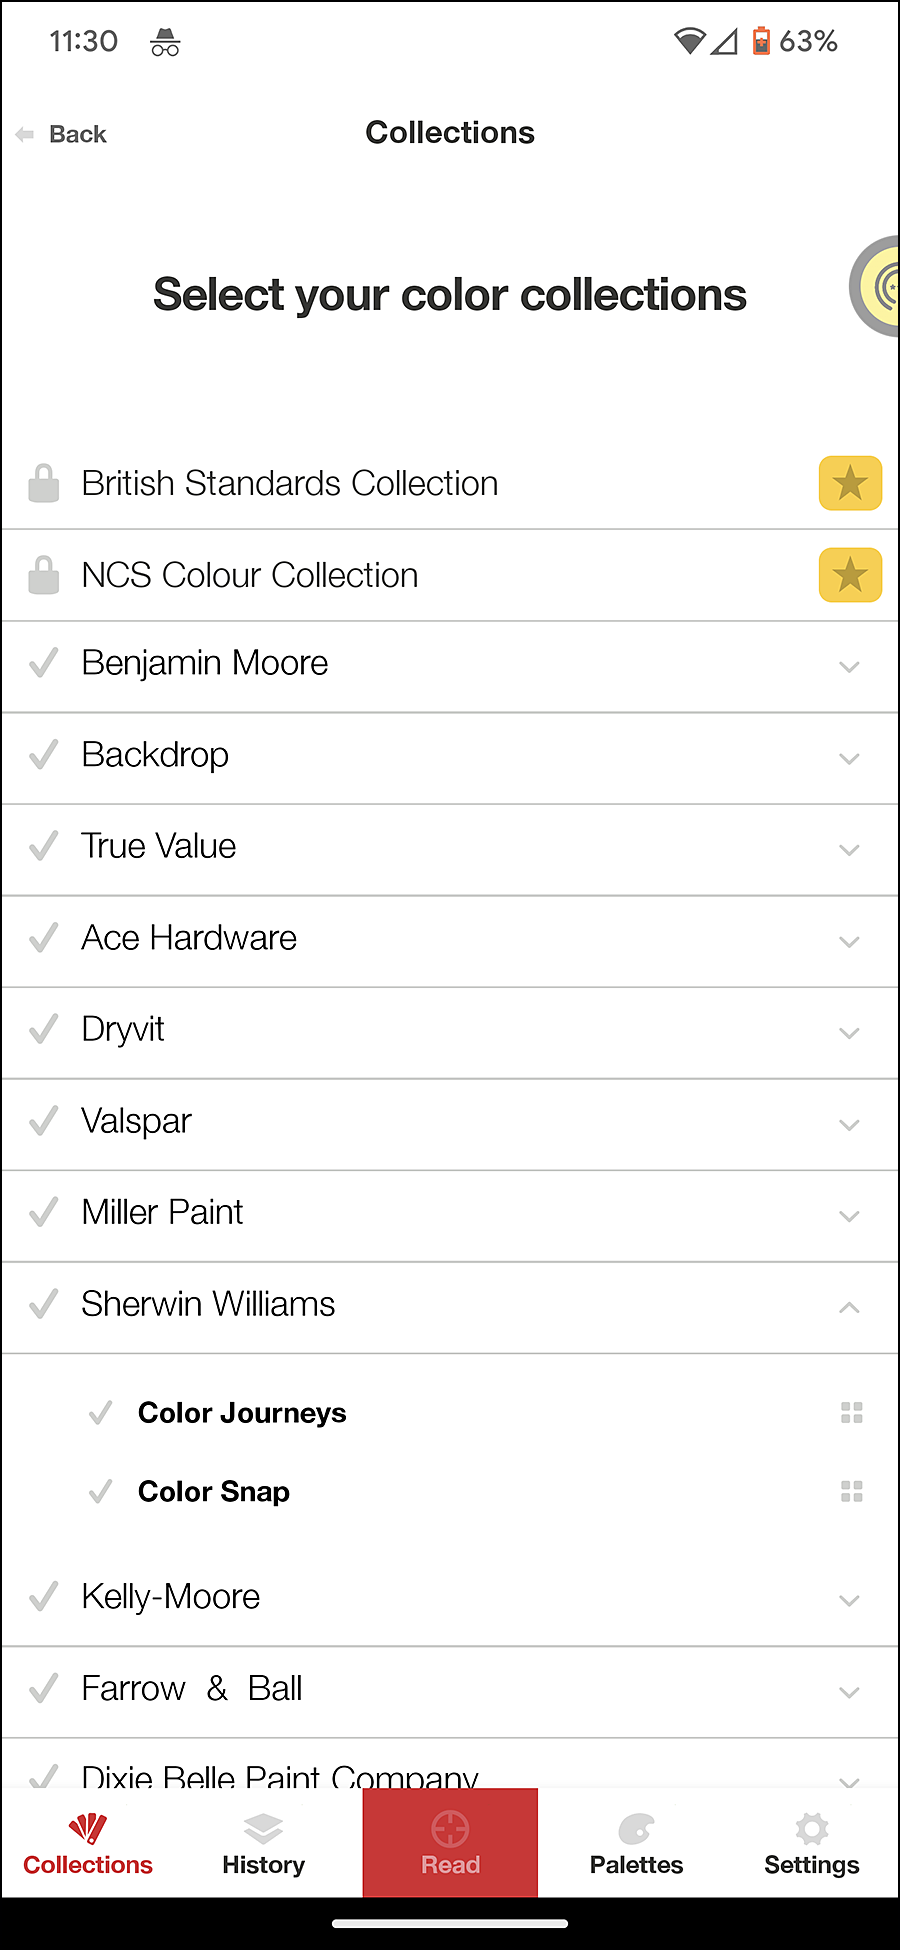
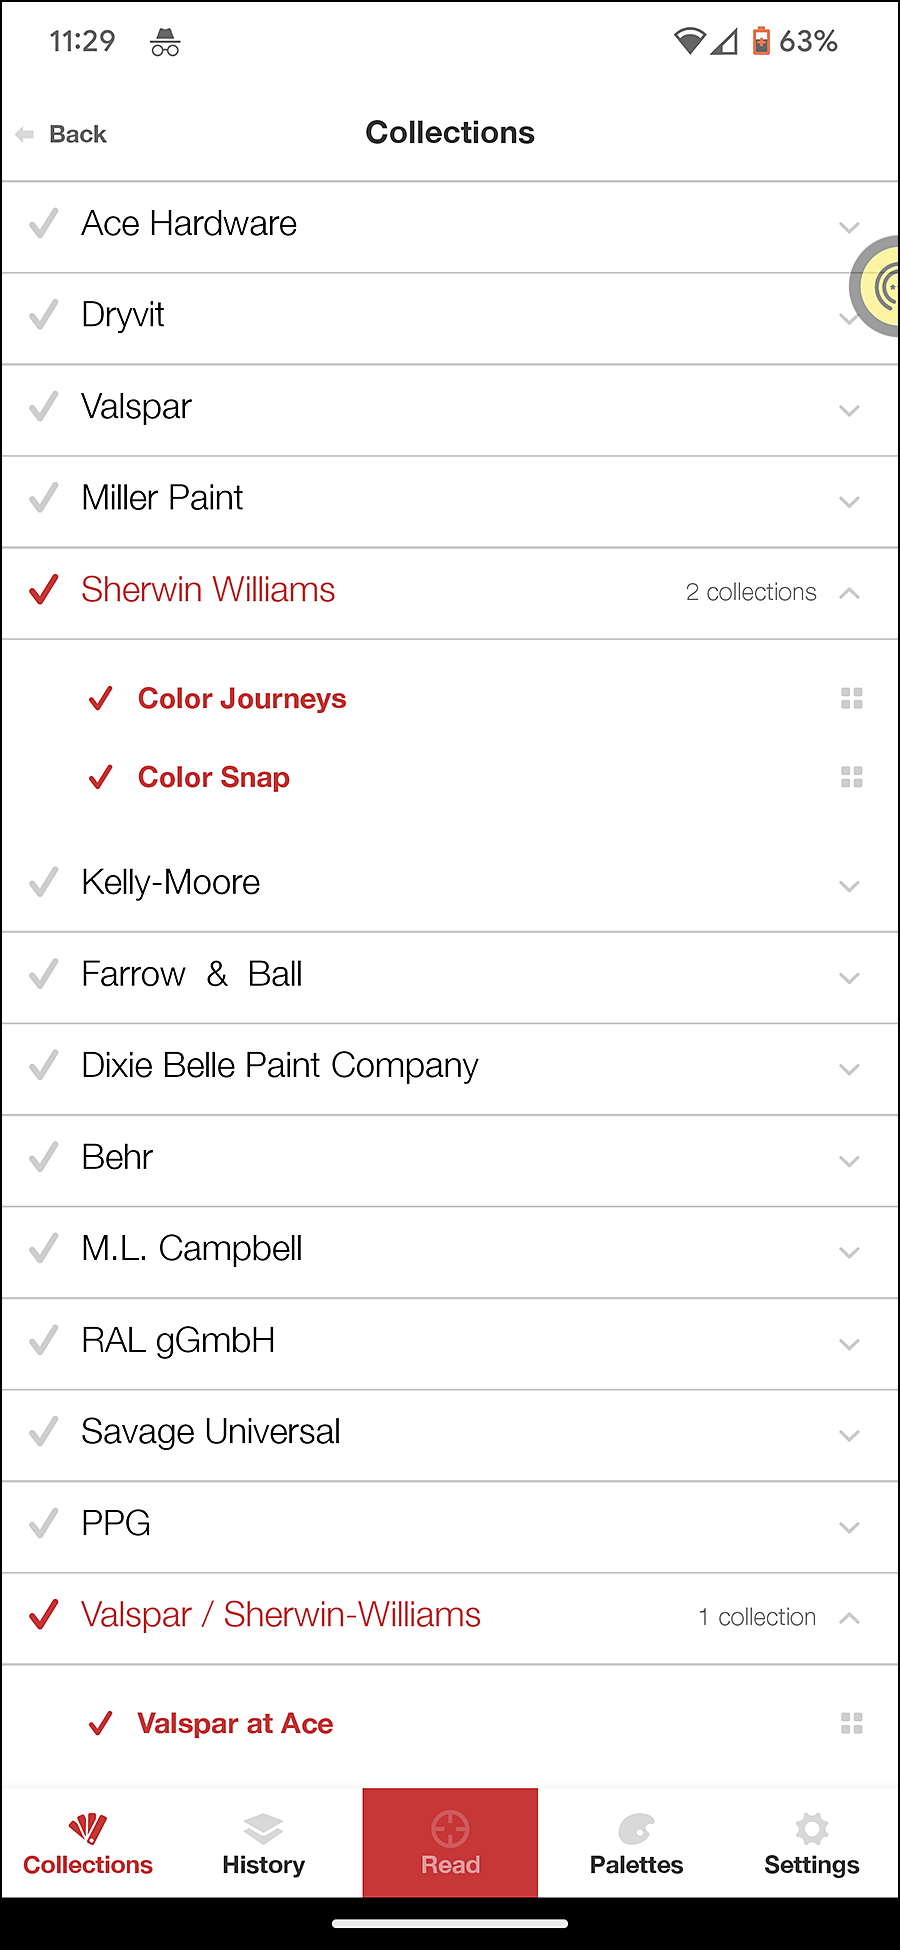
Note — some of the color collections available come with a subscription fee, but I believe these are for industry standard color sets, rather than those provided for free by various paint manufacturers for their own proprietary color definitions.

Before we go any further, let me show you around our foyer in its current state (I might have mentioned my partner is in the middle of a wall color change project).

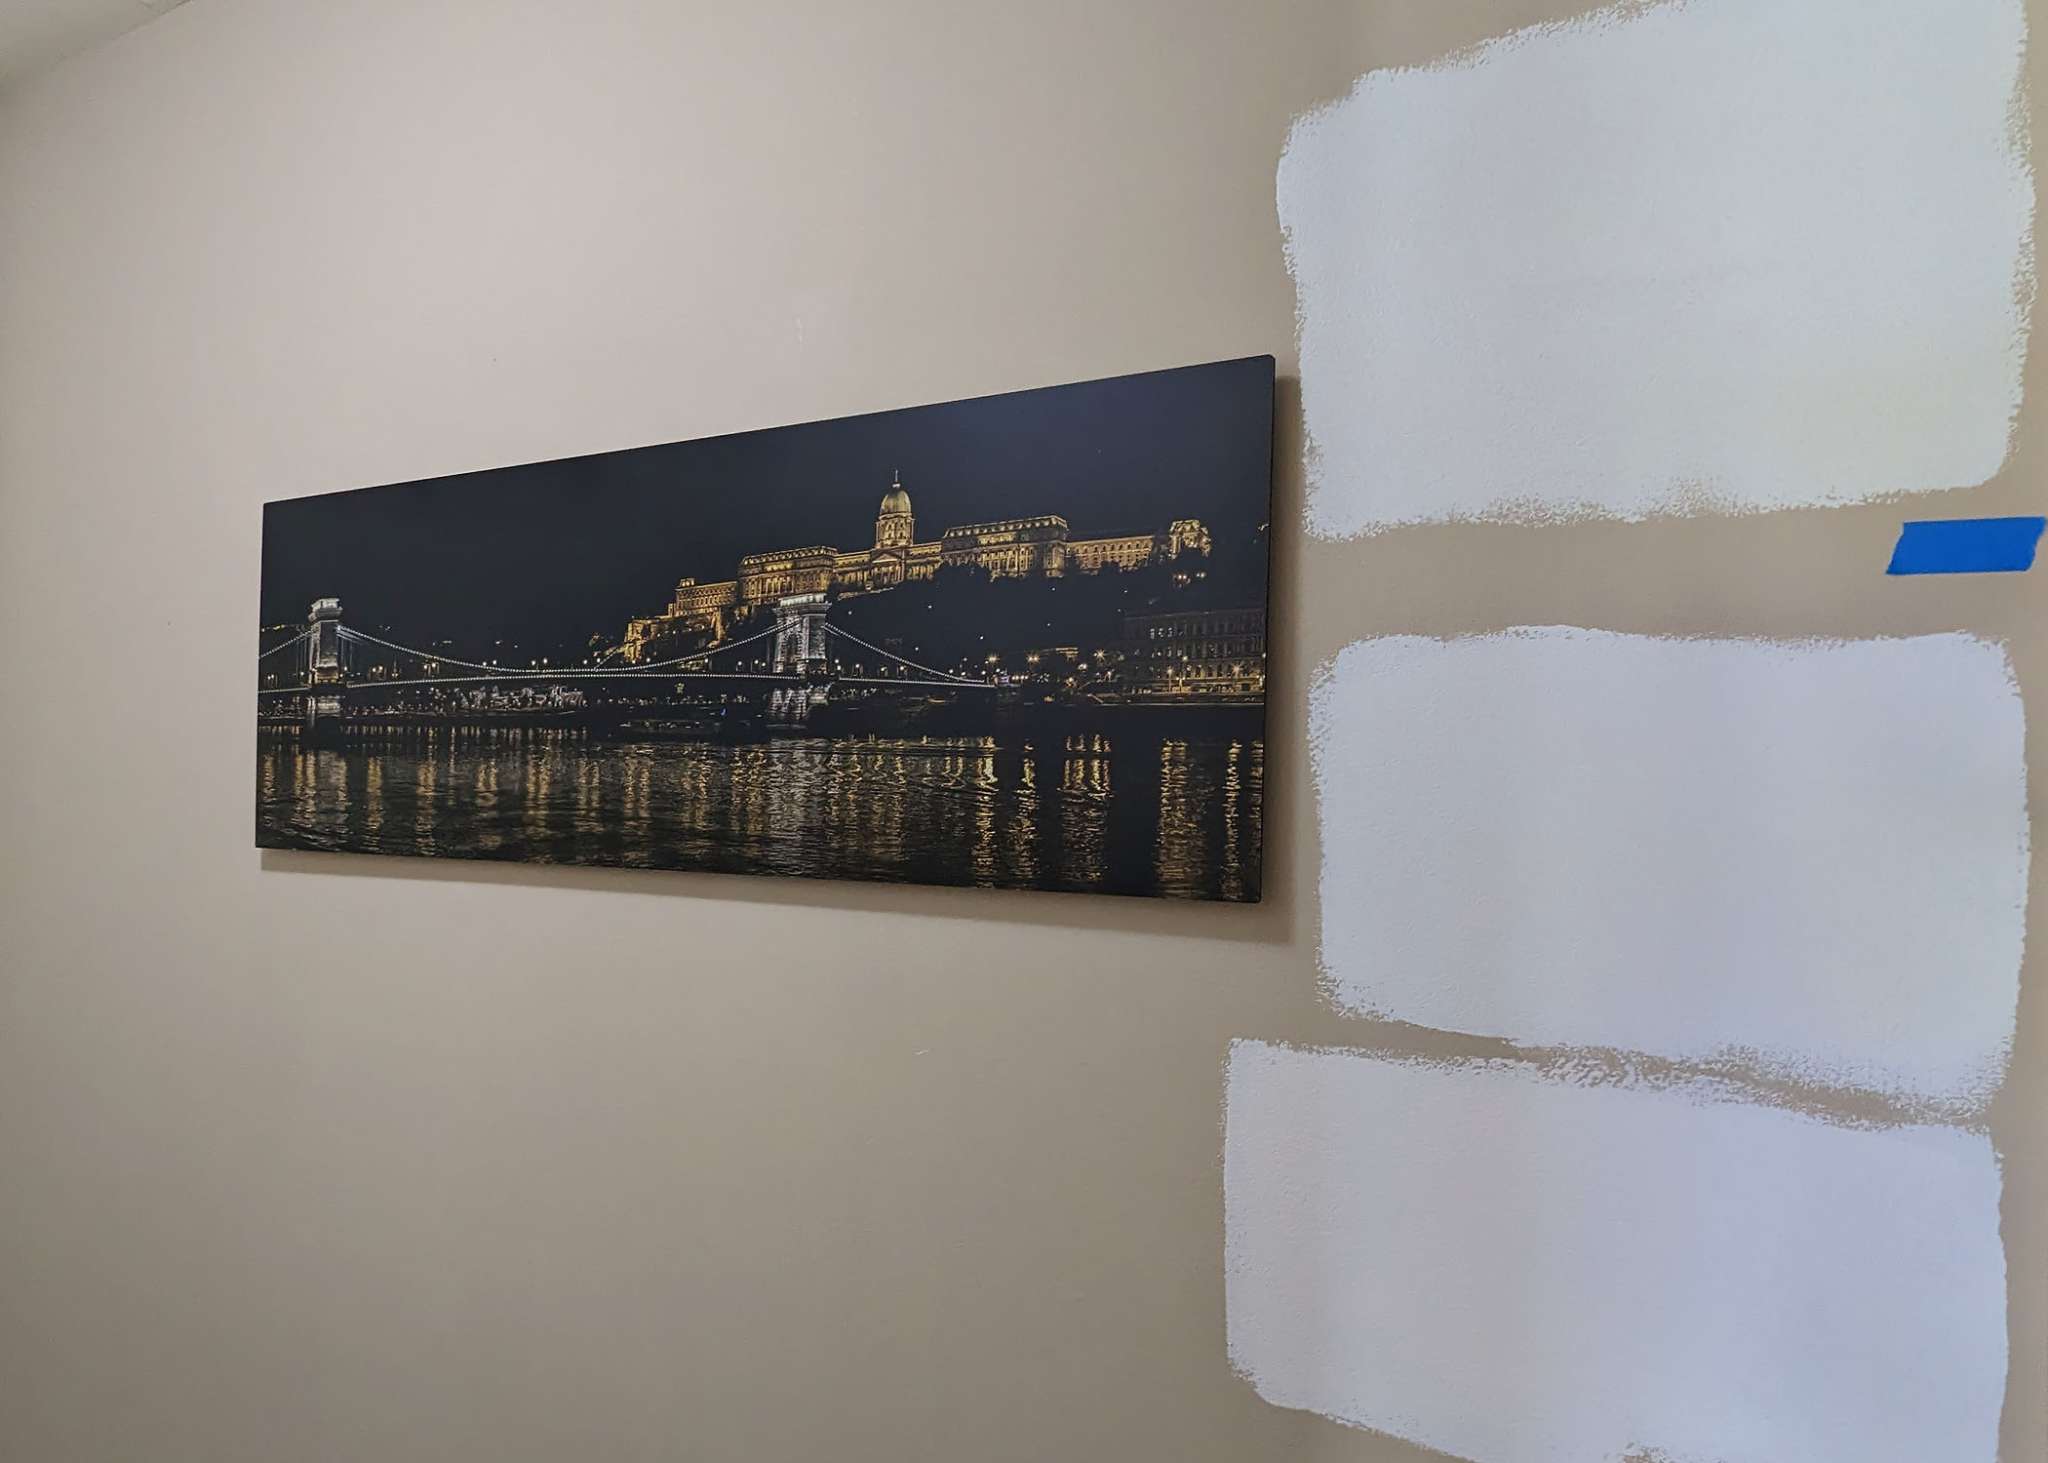

These three white paint swatches you see painted on different walls that receive light from different angles were put up so that she could select the perfect white to replace the existing tan color of the ground floor walls (top half or full length depending upon which room you are standing in). I would love to be able to tell you these swatches were just painted on the wall in the last week. I would also like to be able to report that the painting to replace the tan color and cover over these three white swatches in seven different locations was imminent. Unfortunately, the swatches have been on the walls for well over a month and the painting to replace the tan and cover the patches has not yet been scheduled and may not happen until the Fall.
To quote another Hoosier, “Hi ho.”
After taking a color reading, the app will show the color as interpreted in one of the active color collections.

Once you have a scan in the app you can select the Coordinate Colors option near the bottom of the screen and this brings up the Coordinate Colors screen with tabs for coordinate colors using the Complementary, Triad, Analogous, or Monochromatic methods (five screen grabs combined below). I am ready to admit this information is well over my head and probably better suited for an interior designer or graphic artist. I just thought it was an interesting feature that should be shared.

The original tan color is called Sandrock 434B as you can see from the fourth scan below on the custom color palette I created in the app. Scans one through three are from the three different swatches she had painted on the wall.

Note — of the three scans of the three different white sample patches on the wall, only one came in dead on the color as listed on the respective sample cans from Sherwin Williams. I took a close look at the patches on the wall and I think this is because two coats did not completely obscure the tan paint below — close, but not completely. I also learned that the little sample cans they mix up for you at the paint store are not made from the best quality paint they have to offer — you get the good stuff when you buy a gallon or more. We expect two coats to completely cover when we get the better stuff (assuming we ever get the better stuff).
“Hi ho.”
To test my theory, I took a color reading of one of the ground floor doors that already has two coats of quality Sherwin Williams semi-gloss paint and the reading was exactly the same as the label on the can: Dover White as shown in the fifth slot on the color palette.
I found the ColorReader EZ to be an interesting device and I expect my partner and also my daughter with the graphic arts degree and business will use it in the future.
One other thing to mention — it does seem to put a pretty heavy load on the two 2032 watch batteries it uses for power.

After what I would call pretty light use over the course of three days, the battery level was already down to 40%. It is possible the batteries that came with it were not very high quality or too old, but I thought this worthy of a heads up.

SpyderCUBE

Out of all of the photography goodies in the box from Datacolor, I found the SpyderCUBE to be the most disappointing. As mentioned previously in this review, the SpyderCUBE is a white balance and exposure tool similar to the Datacolor Spyder Checkr Photo that I wrote about in one of Julie’s recent gift guides for photographers. It also accomplishes the same purpose as the more simple Black/70% Gray/White target that I have used for nearly two decades to set white balance for my digital images. The basic concept is to take a photo using one of these methods in the same light as your subject. An example of a SpyderCUBE photo taken under the same lighting conditions as the photos I took for the SpyderLENSCAL portion of this review (coming up) shown below.

Once you have the calibration photo — regardless of the baseline device you are using (SpyderCUBE, the Spyder Checkr Photo, or a simple grayscale card) you will use this baseline photo in post processing to set the white balance for every photo taken under this specific lighting condition. These kinds of tools are particularly useful for a volume photographer like me. I typically take several hundred photos under precisely the same lighting conditions, so one calibration shot can be used to set the white balance for all of these photos. I shoot all of my photos in Camera RAW format, so my first step in post is to pull my grayscale baseline shot into Adobe Camera RAW and use the 70% gray area to set white balance for all of the photos in one quick step. I won’t go into any further detail about my post processing workflow for the purposes of this review, so let me get to why I was disappointed by the SpyderCUBE. In my test shots it caught too much glare from the natural light source in the photo — rendering the gray area on the device worthless for white balance purposes. In a nutshell, with the glare it was no longer a 70% gray. It was too close to white.
Below is a photo of the simple white/gray/black target I typically use for my baseline photo. The target has a flexible metal frame that folds up to about one fourth of the size shown here and it easily fits in my camera bag. the SpyderCUBE is significantly smaller and would fit even more readily into my bag — if only it did not have the glare problem that nullifies its usefulness for my purposes.

Note — there is no shine anywhere on the matte service of this grayscale target. I take one photo of this thing at the beginning of every photo shoot after I have dialed in the strobes. I can then use this single photo to perfectly set the white balance on every photo from the shoot in a single post processing step. This approach is less useful for taking photos in a lot of different lighting conditions over the course of a photo session because each lighting condition requires a different calibration photo of the target. Also, gray scale targets are not particularly useful for taking photos of something far away where it is not practical to get a shot of the target under the same light. The same reduced usefulness would apply to any of the methods I know of to generate a white balance calibration photo.
SpyderLENSCAL
Last, but not least is the SpyderLENSCAL. As I mentioned in the Hardware Specs above, before you order the SpyderLENSCAL, make sure your camera supports auto-focus adjustments (typically professional level DSLR’s). If only I had followed this advice myself! I had intended to use the SpyderLENSCAL to dial in the focus on all of my lenses attached to my Canon R5 mirrorless body — currently my main camera.

When opened the SpyderLENSCAL and downloaded the user guide, I noticed that my R5 was not listed on the page with compatible cameras. At first, I assumed this was because the R5 mirrorless camera body came out after the documentation had been written. It turns out that assumption was incorrect. Because of the way mirrorless cameras focus, there is no longer a need for the focus tweaking that used to be common if a discerning photographer wanted to perfectly focus match each lens in the camera bag to the camera body. Most modern DSLRs have a menu specifically for these micro-adjustments.
So, good news and bad news. The bad news, my latest camera body, The Canon R5 is mirrorless and thus there is no menu to make these micro-adjustments to the autofocus system. This is also good news in that my mirrorless camera system — barring some serious malfunction — does not need these adjustments due to the way the autofocus system works.
I was a bit disappointed because I wanted to use this device on my latest camera body, but eventually, I came around to the positive nature of this development. Fortunately, for the purposes of this review, my backup camera body (and previous production camera body), the Canon 7D Mark II, does support micro-adjustments. The 7D Mark II is a DSLR, which stands for Digital Single-Lens Reflex. This basically means the camera supports interchangeable lenses (as does my mirrorless Canon R5), but a DSLR also uses a mirror system that allows you to actually look through the lens when you put your eye up to the viewfinder. My Canon R5 also has a viewfinder, but inside the viewfinder is a tiny high-resolution screen (basically the same as the screen on the back of the camera, but smaller and higher resolution. The viewfinder on my R5 has 5.76 Million dots compared to 2.1 Million dots on the 3.15″ LCD on the back of the camera. There is no mirror and the viewfinder does not actually allow you to look through the lens — you look at a live feed of the data from the camera sensor. Enough about all of that.

First I had to set up the SpyderLENSCAL on a tripod and get the device level.

There is a circular bubble level integrated into the base of the device, so it was simply a matter of tweaking the position using my tripod head until the focus tool was perfectly level. This only took a couple of minutes. The user guide specifies how much distance is needed between the camera and SpyderLENSCAL. This distance is based on the focal length of the lens. Here is a photo of my setup with my Canon 70-200mm lens mounted on my 7D Mark II camera body.

Note — the two tripods are entirely too close together to take the calibration shot for a 200mm lens, but I put them closer to get this photo. When I actually took the calibration photos, I spaced them apart as specified in the user guide. The camera must also be mounted on a tripod for this testing to keep the distance between the camera and SpyderLENSCAL the same if multiple shots are needed to dial in the focus.
Using the camera and lens I was testing, I took the photo of the SpyderLENSCAL ensuring that my focus point in the viewfinder was locked onto the quad square-shaped pattern that is lined up precisely the same distance from the camera as the 0 (zero) center line on the angled gauge on the right side.

As you can see here, this camera/lens combination was perfectly focused on the ‘0’ line at the center of the angled gauge. The focus fall off going farther away on the gauge and coming closer to the camera on the gauge was even. This proved to be true for all of my lenses, so there was no need to make any adjustments. Had it been necessary, I would have selected the AF Microadjustment setting on my Canon 7D Mark II which is turned off by default.

This would have opened the AF Microadjustment menu where an adjustment could be made that applies to all lenses when used on this camera or a custom adjustment for each lens that needs a tweak. The camera would remember that setting and apply it the next time you mounted the same lens.

I decided to go ahead and take a photo of the SpyderLENSCAL using my Canon R5 and my three main lenses, but this was really just for my own piece of mind. If the focus had been off at all I would have had to send the gear in to Canon for repair. Fortunately, they were all spot on. I am glad I was able to positively verify that both of my camera bodies are dialed in and focusing precisely with all of the glass in my bag. This piece of mind was worth the price tag as far as I am concerned.
The SpyderLENSCAL would be especially useful for the owner of a DSLR with AF micro adjustment capabilities that produce photos that are not tack sharp.

Setup
Datacolor does not include any printed instructions with any of these products aside from cards that provide a link to download the related user manual and software if applicable. The cards also provide serial numbers when applicable to register and activate the device and software.
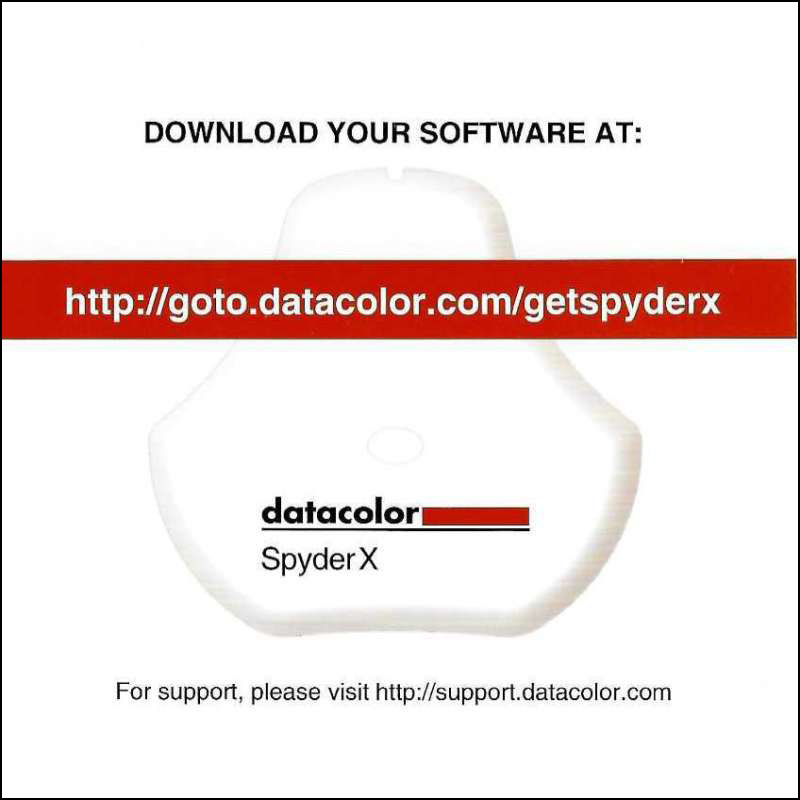
With the exception of the smaller accessories in the Spyder X Create Kit, each device had its own card and respective landing page under the goto.datacolor.com area on Datacolor’s website. You have to specify the device using the correct location in the URL (e.g., goto.datacolor.com/getspyderx) or you will be redirected to Datacolor’s homepage. Reach out to me if you would like to take a look at the user manual for any of the other devices in this review and I can provide the link. The device pages also have a link to the Datacolor Knowledge base for the device to help find solutions to problems or report them to Datacolor if there is no resolution already listed.
When I entered the link on the card above it took me to the web page for the Spyder X Pro device and gave me access to the quick start guide, user guide, and SpyderXPro application for my PC.

I am not going to go into an in-depth description of installing the software, but I just accepted the defaults and installed the SpyderXPro application on my Windows PC.
The ColorReader EZ refers you to the Google Play Store or the Apple App Store to download the app for your respective phone.
The page for SpyderLENSCAL did not have any links for an application as the software involved for this accessory is embedded in the camera gear you are calibrating, but it did have a link to the user guide.
What I like
- Spyder X Create Kit includes everything you need to accurately calibrate all of your monitors.
- Spyder X Create Kit also includes the ColorReader EZ that allows you to take readings of colors.
- SpyderLENSCAL is a well-designed gauge for testing and adjusting the autofocus system on a DSLR.
What I’d change
- Make the SpyderCUBE a little larger and make sure the surface finish is matte enough to avoid picking up glare.
- Longer battery life for the ColorReader EZ.
Final Thoughts
I found the Spyder X Pro to be an easy to use and intuitive way to accurately calibrate the color output of my displays. I appreciate the piece of mind I get from knowing what I see on each of my screens is what I will get from the printers. This is particularly important to me because of the large quantities of prints I order and the low-profit margin for my volume photography products.
Price: Spyder X Create Kit $279.00 : SpyderLENSCAL $69.00 : SpyderCUBE $54.00
Where to buy: Datacolor Shop and Amazon
Source: The sample of this product was provided by Datacolor.
