REVIEW – Shooting cinematic video on phones has taken off in the last decade. Since smartphone cameras have gotten so good, it makes sense that people would want to use them for low-budget movies, short films, commercials, etc. Typically smartphone cameras are limited to 16×9 video so how do you shoot cinematic, widescreen footage without cropping the image, potentially reducing quality in the process? SmallRig has the answer with their new 1.55x Anamorphic Lens. Here are my thoughts on the lens, how it is to shoot with it, and how I think it could be improved.
What is it?
The SmallRig 1.55x Anamorphic Lens is a 2.76:1 anamorphic lens attachment for select iPhone and Android phone models, as well as recent iPad mini, Air, and Pro models. This lens allows for cinematic style shooting with a regular, 16:9 camera, allowing the shooter to make the most of the excellent video camera they already have in their pocket.
What’s in the box?
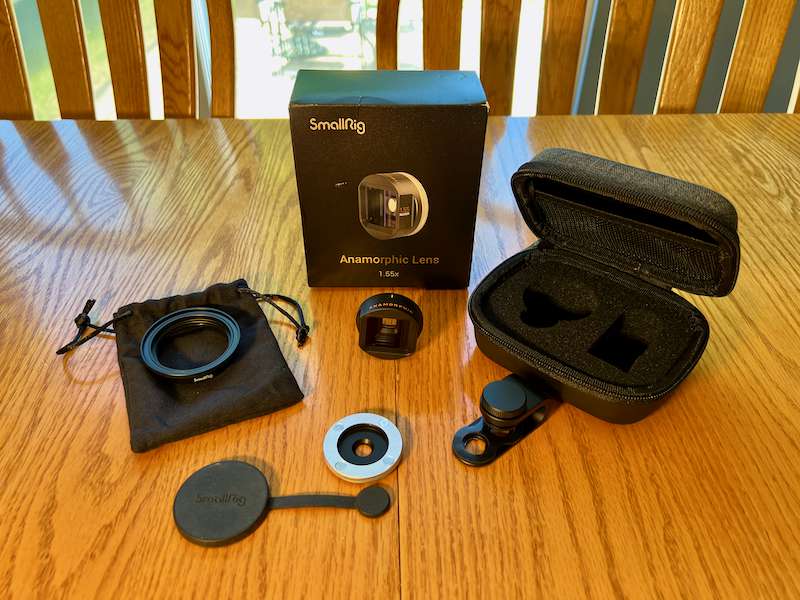
- Anamorphic Lens & Magnetic Attachment
- Lens Clip
- Storage Bag
- Storage Case
- Lens Cleaning Cloth
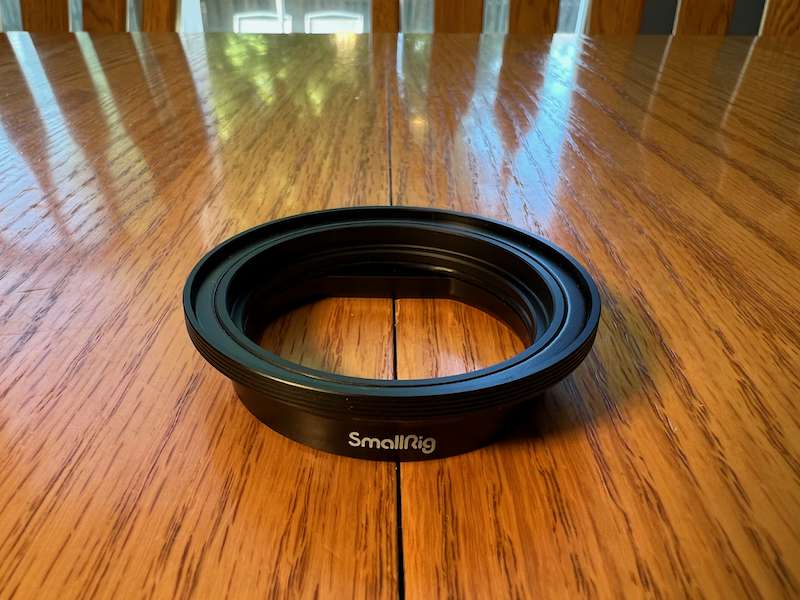
- 52mm Lens Filter Ring Adapter
- Silicone Lens Cap
Hardware specs
- Dimensions: 1.57 x 1.57 x 0.83 in. (40 x 40 x 21.2 mm)
- Weight: 1.68 oz (47.5g)
- Angle (diagonal): Max 120°
- Magnification: 1.55X
- Distortion: -37%
- Minimum Object Distance: 70-90 mm
- Mount Type: Standard M mount
- Optical Structure: Two Schott low dispersion lens x2 sets
- Coating Film Specification: Multilayer antireflection broadband
- Materials: Aluminum alloy, glass, silicone, magnet, etc.
- Processes: Anodizing, painting
Design and features
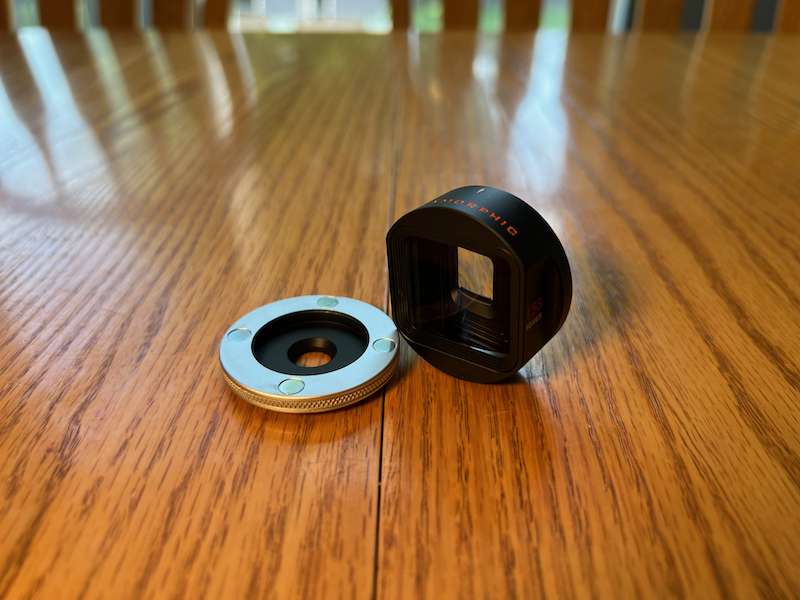
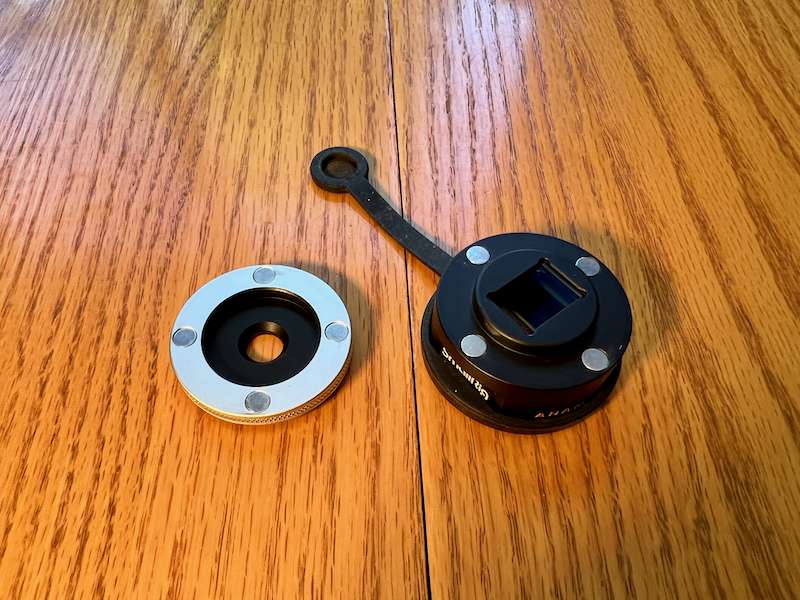
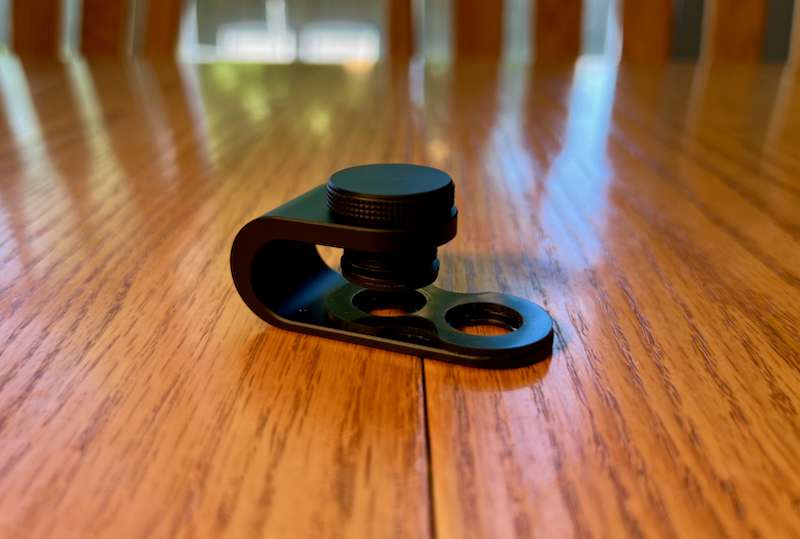
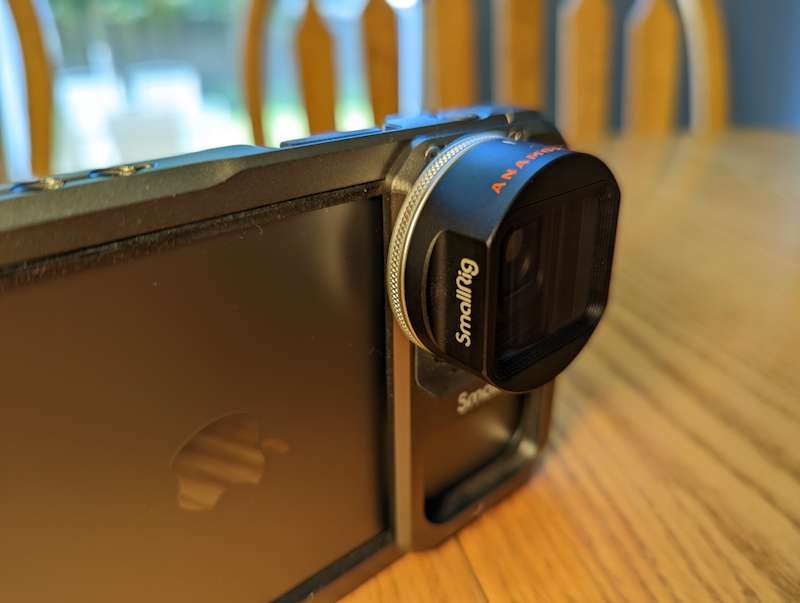
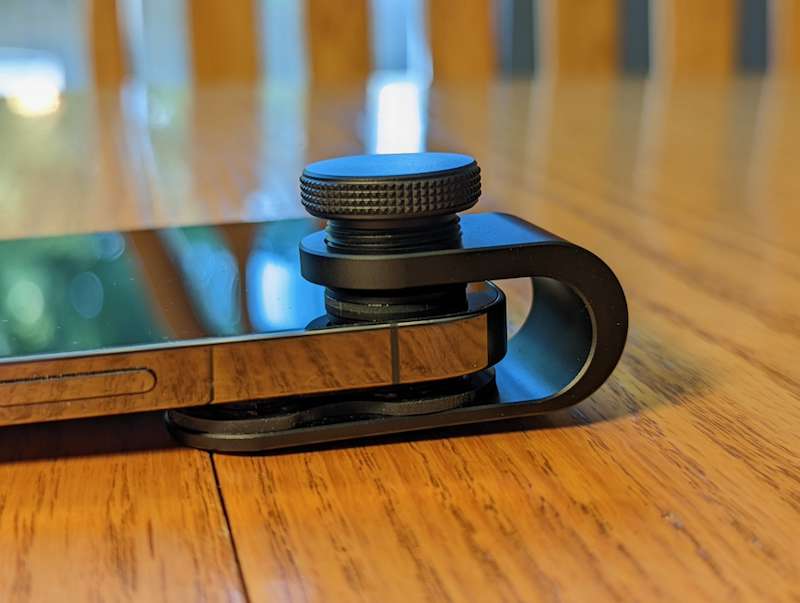
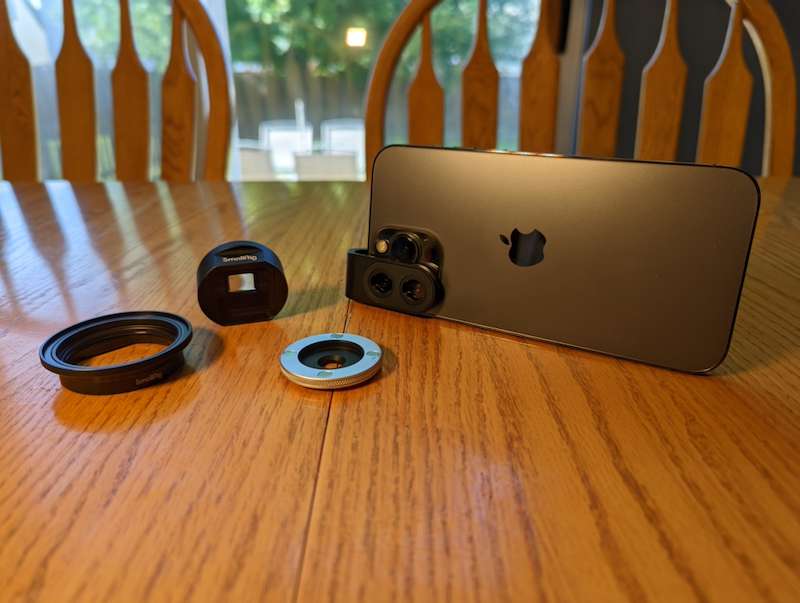
The SmallRig lens is a phone or tablet attachment that basically comes in three parts – the lens, the clip, and the magnetic ring that attaches to the clip and holds on to the lens. The lens body is made from aluminum alloy and the lens itself is made from Schott low-dispersion glass with multi-layer high-definition coating. The lens can be attached to the phone with the included clip, which has a knob for tightening to the phone, or you can get one of SmallRig’s mobile video cages, like the one I reviewed a while back. The magnetic ring attaches to the clip or frame and the lens attaches to the ring. The ring and lens have four strong magnets each, and you can attach the lens horizontally or vertically, depending on the way you want to shoot.
I appreciate the inclusion of a filter holder. I don’t have any filters to try so I didn’t test the holder other than to see how it fits. It just slides onto the front of the lens; there’s nothing but pressure holding it on. As long as your filter doesn’t weigh too much and you don’t bounce the phone around like crazy it should stay on just fine. One note that SmallRig mentions on their site is that this filter holder doesn’t work with variable ND filters. I’m not sure what prevents them from working but I wanted to point it out here.
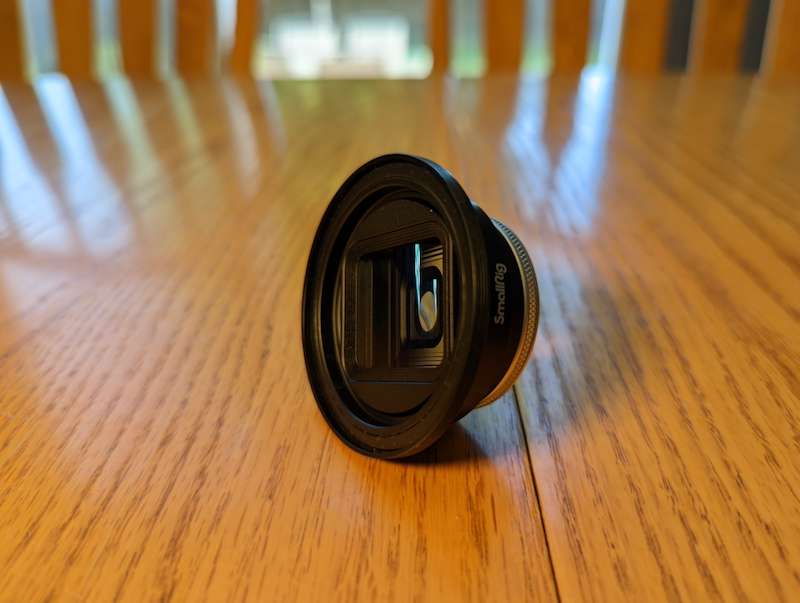
This lens features what SmallRig calls “brushed flare for special effects.” This is the lens flare you get when a bright light is shining directly into the lens from a certain angle. Lens flares have been used as an effect for many years (JJ Abrams anyone?) and under the right circumstances, they can be fun and creative. I’ll have more to say about the lens flares below.
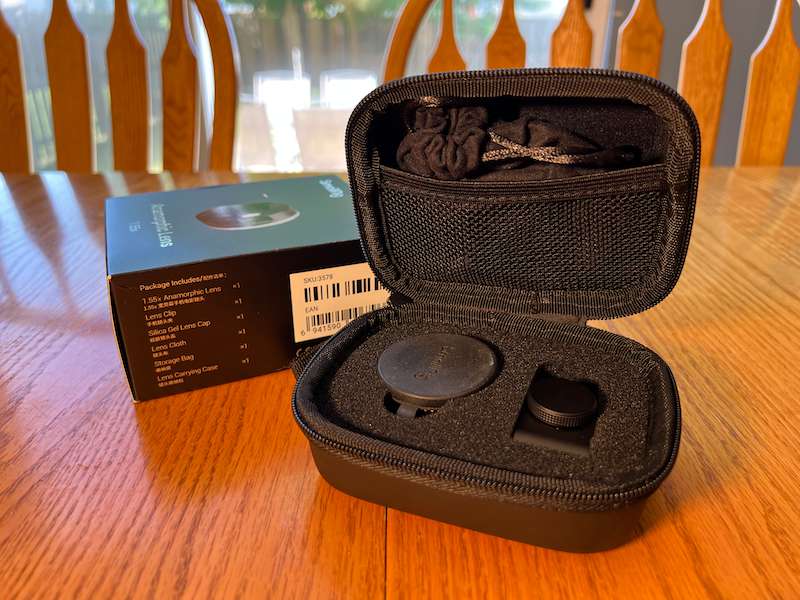
The included carrying case is perfect for carrying all of the parts with a little room left over for more if you have a few filters or other small accessories to carry around. It’s a soft-sided, zippered bag, with cutouts in the bottom section for the lens and the lens clip, and a mesh section at the top for the rest of the parts.
Installation and setup
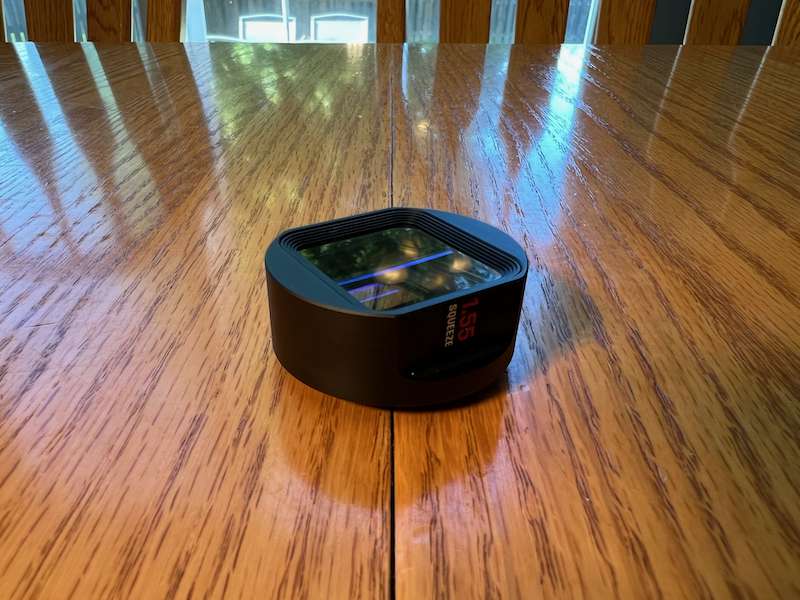
To install the lens, first attach the clip or put your phone in a video cage sized for your phone, mount the magnetic ring, then attach the lens to the ring. Make sure to orient the lens correctly for the direction you’ll be shooting (landscape or portrait) or you’ll see some unnecessary vignetting and your image will be stretched the wrong way on playback. I did all my test shooting with the part of the lens that has a white line and the word ANAMORPHIC in orange letters pointing up since I was shooting in landscape. I can’t imagine shooting an anamorphic portrait video but I’m sure someone out there has a use for it that I’m not thinking of.
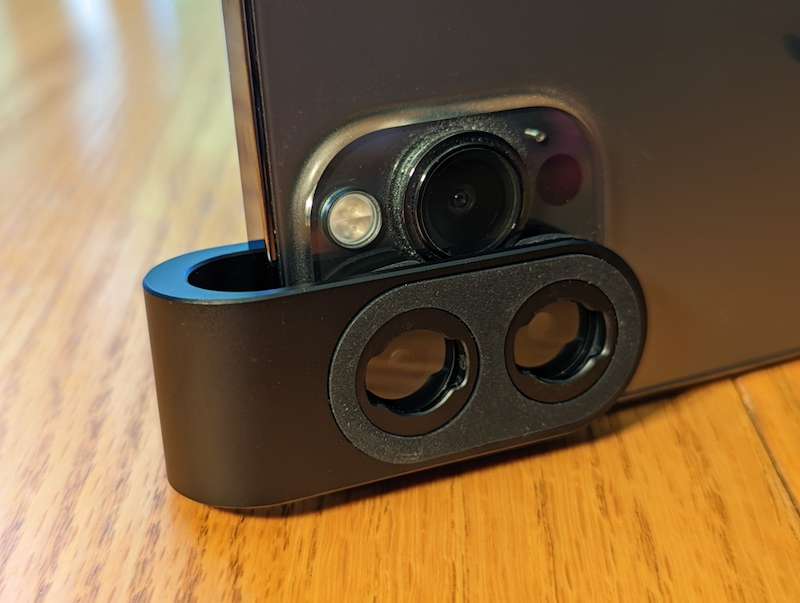
If you’re using the included lens clip, make sure not to tighten it down too much. I could see it cracking the glass of your phone if you’re not careful. I also couldn’t use the lens clip with a case on my phone, which is why I did most of my testing with the mobile video cage since it has the proper mounting sockets built in. Your mileage may vary, depending on the phone and case you’re using. If you’re using an iPhone 12/13 Pro or Pro Max, the lens can be used in front of either the standard wide or telephoto lenses, but not the ultra-wide. I can’t speak for other phone manufacturers but my guess is this just won’t work correctly with any of the ultra-wide lenses out there.
It’s possible to shoot anamorphic footage with the standard camera app that comes with your phone, but you may get better results by using an app like Filmic Pro or the FotorGear Pro Cam app because they give you a lot more options for shooting, including shooting with ProRes on an iPhone, as well as recording in the native aspect ratio of the anamorphic lens, meaning you don’t have to stretch the footage in editing. I did most of my testing with Filmic Pro, which I already had, but I also shot some footage with the standard iPhone camera app. I’ll include two separate videos below to show footage shot from each app. I’m not familiar with FotorGear, which is an iOS only app, and I don’t know which Android apps would be best for shooting, other than Filmic Pro, which is available for both iOS and Android.
Once the lens is attached you’ll need to do a little setup in your camera app, unless you’re using the default built-in camera app and you want to use its default settings, or you’ve already tweaked them to your liking. In Filmic Pro I set the video settings as follows:
2K Resolution
16:9 Aspect Ratio
8 bit
Filmic Extreme
HEVC
Video HDR
Local Tone Mapping
60 FPS
60 Hz Shutter
I could have chosen a higher bit rate, ProRes or Dolby Vision HDR, and several other settings that would have given me higher quality original footage to work with but those also would have increased the needed storage capacity. Since I was on vacation and didn’t have a laptop with me to offload footage if my phone got full, I chose what I knew would still give me quality footage while consuming less disk space. I also could have shot in 24 or 30 fps but I haven’t done much 24 fps shooting, plus I wanted to be able to slow down some of the footage. My final videos will be 30 fps, which means I can slow down my 60 fps shots to 50% smoothly. These settings gave me video that was 3174×1152 pixels and file sizes ranging from 40 MB for the shortest clip (10 seconds) to about 250 MB for the longest clip (1 minute).
Once attached the lens isn’t going anywhere without a pretty good amount of force. I had no concerns about it falling off while I was hiking around Hawaii on some pretty rugged terrain at sea level as well as up to 10,000 feet. The magnets are strong and really grab onto the lens.
In Use
I happened to have a vacation in Hawaii during the time I was testing this lens, which provided an abundance of beautiful scenery to shoot. I will say I’m not the best director or cinematographer out there. I have a degree in film and video production (from the mid-90s) but in my day-to-day work, I rarely shoot anything anymore so I’ll say I’m a little rusty. I know how to frame a shot and hold a camera pretty steady so I hope the example shots I’ve taken here help the reader understand the capabilities and limitations of the lens.
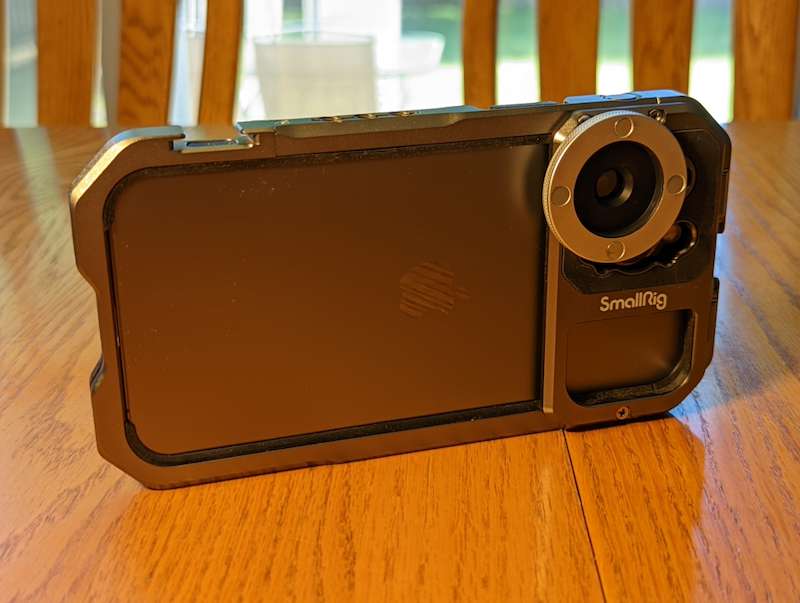
Because I already had the SmallRig video cage for my phone I did most of my shooting with the lens attached to that. In my opinion, this is the best way to shoot with a lens attachment like this because it doesn’t prevent you from using your phone in a normal way. It basically acts as a large aluminum bumper-style case, which for many will be enough, especially if you don’t normally keep a case on your phone. I always use a case because my phones have dropped out of my hands so many times over the years that I just can’t use a slippery glass and aluminum slab full of expensive electronics without one. If you choose to use the lens clip it will interfere with the use of your screen directly opposite wherever the lens is on the back of your phone. It’s easy enough to remove but you’ll have to put it back and align it properly every time you want to use it again.
Using the lens with the SmallRig video cage made it a breeze to use. Once I figured out how to rotate the magnetic ring to the proper orientation and which part of the lens should be facing up, snapping the lens on and off was simple. I kept the lens cap on the lens while not shooting and always held it in my hand while I was shooting, ready to put it back on as soon as I got the shot. Since there was so much sand and salt water spray I wanted to keep the lens as clean as possible. One thing I’d like to see is a lens cap that covers the back of the lens when it’s separated from the magnetic ring. The included lens cap is sized to cover the front of the lens and the part of the magnetic ring that attaches to the clip or video cage, which is great when you’ve removed the whole thing, but I spent a lot of time holding the lens in my hand when I was shooting photos or 16:9 video with the standard wide angle lens between shooting these cinematic videos. (I still wanted to have regular vacation photos and videos.) When I had the lens removed but the magnetic ring still attached, there was nothing to cover the back side of the lens; I did manage to get a pretty big smudge on it once, ruining a few of the shots I had taken but couldn’t see very well until later because of the bright sunlight.
When I wanted to shoot standard photos and videos with the telephoto or ultra-wide lenses built in to my phone I had to remove the magnetic ring because it blocked those other lens openings. This isn’t a major problem and if you’re not shooting mixed photos and videos like I was it won’t be a problem. You’ll most likely only have to switch the lens around when you want to switch from wide to telephoto modes. I did find that the 3x zoom on my phone was a little too much in combination with the lens so I probably won’t be shooting with it very much myself unless I have my phone on a tripod and need to shoot subjects pretty far away. Even shooting some footage across the street from my front yard seemed a little too zoomed in.
I did notice quite a bit of wobbling in the image, especially near the ocean when the wind was blowing really hard. I shot all my footage handheld other than a few short time-lapse clips I shot with a short tripod. This isn’t something I see when I’m shooting handheld with the standard built-in lenses on my phone so I’m not sure what the difference is. I know the phone has built-in stabilization but it seems like this wobble is a bit too much for this system. Shooting with a tripod or a gimbal would probably minimize or eliminate this but I couldn’t do my hiking very easily while carrying a tripod and I didn’t have room for either a tripod or gimbal in my luggage. I’m especially curious to see what effect the gimbal will have while shooting with this lens.
One other image artifact I noticed is a little bit of warping at the top and bottom edges. This was most noticeable when I tilted up or down, and I actually thought it looked kind of cool, but just be aware of this phenomenon. There’s also some distortion at the left and right edges of the frame, most noticeable when you see something that’s perfectly vertical.
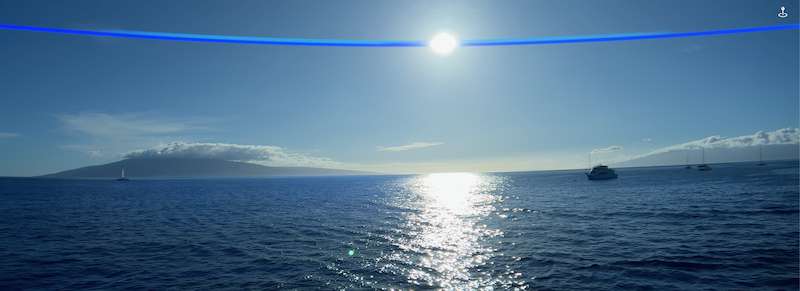
Finally, I think the lens flares are too extreme and distracting. The flare ends up being a big, horizontal blue streak across the image, which for my taste isn’t desirable. Most lens flares (at least the ones I like) end up being a bright highlight, streaking across the image, but not a big blue line, or a series of small circles that run from one part of the image to the other, depending on the angle of the light shining into the lens. After I saw the first lens flare I did everything I could to make sure it didn’t happen again but it’s not avoidable in every situation, especially when shooting outside.
Sample Videos
This video was shot first on Hawai’i, the big island, around our pool, on the way to the green sand beach, then while hiking around the crater on Kilauea; we then went to Maui and I hiked Haleakala and then we went for a dinner cruise out of Lahaina.
I shot this next video around my house with the lens attached to my phone with the included lens clip and shot with the built-in camera app on my iPhone 13 Pro Max in 4K 60 fps. I stretched the footage 1.55x in Final Cut Pro to make up for the squeezed image from the anamorphic lens since the standard camera app has no way to compensate for it while shooting.
What I like
- Cinematic style shooting with a phone camera
- Lens solidly attaches to magnetic ring – it isn’t going anywhere
- Easy to put on and take off
- Handy case to hold all the parts
What I’d change
- Lens cap for the back of the lens when removed from the magnetic ring
- Lens flares too pronounced
- Included clip blocks part of the screen
Final thoughts
Overall, shooting with the SmallRig 1.55x Anamorphic Lens was easy and fun. It’s easy to put on and shoot with and can give you some quality footage you can’t get any other way. There are a few minor things I’d like to see changed or added but if you want to shoot cinematic quality video with a phone this is a great lens to choose.
Price: $99
Where to buy: smallrig.com or Amazon
Source: The sample for this review was provided by SmallRig. For more information visit their site.
